Getting Started with Asset Optics
This guide will walk you through the process of setting up and using Asset Optics for your projects.
Prerequisites
- A modern web browser (Chrome, Firefox, or Edge)
- An Asset Optics account (sign up at asset-optics.brahmaforge.com)
- Paid for the plugin on Fab Marketplace Unreal Engine
Installation
Web Platform
- Navigate to asset-optics.brahmaforge.com
- You're ready to use the web platform!
Unreal Engine Plugin
- Download the AssetOpticsPlugin from the Unreal Marketplace
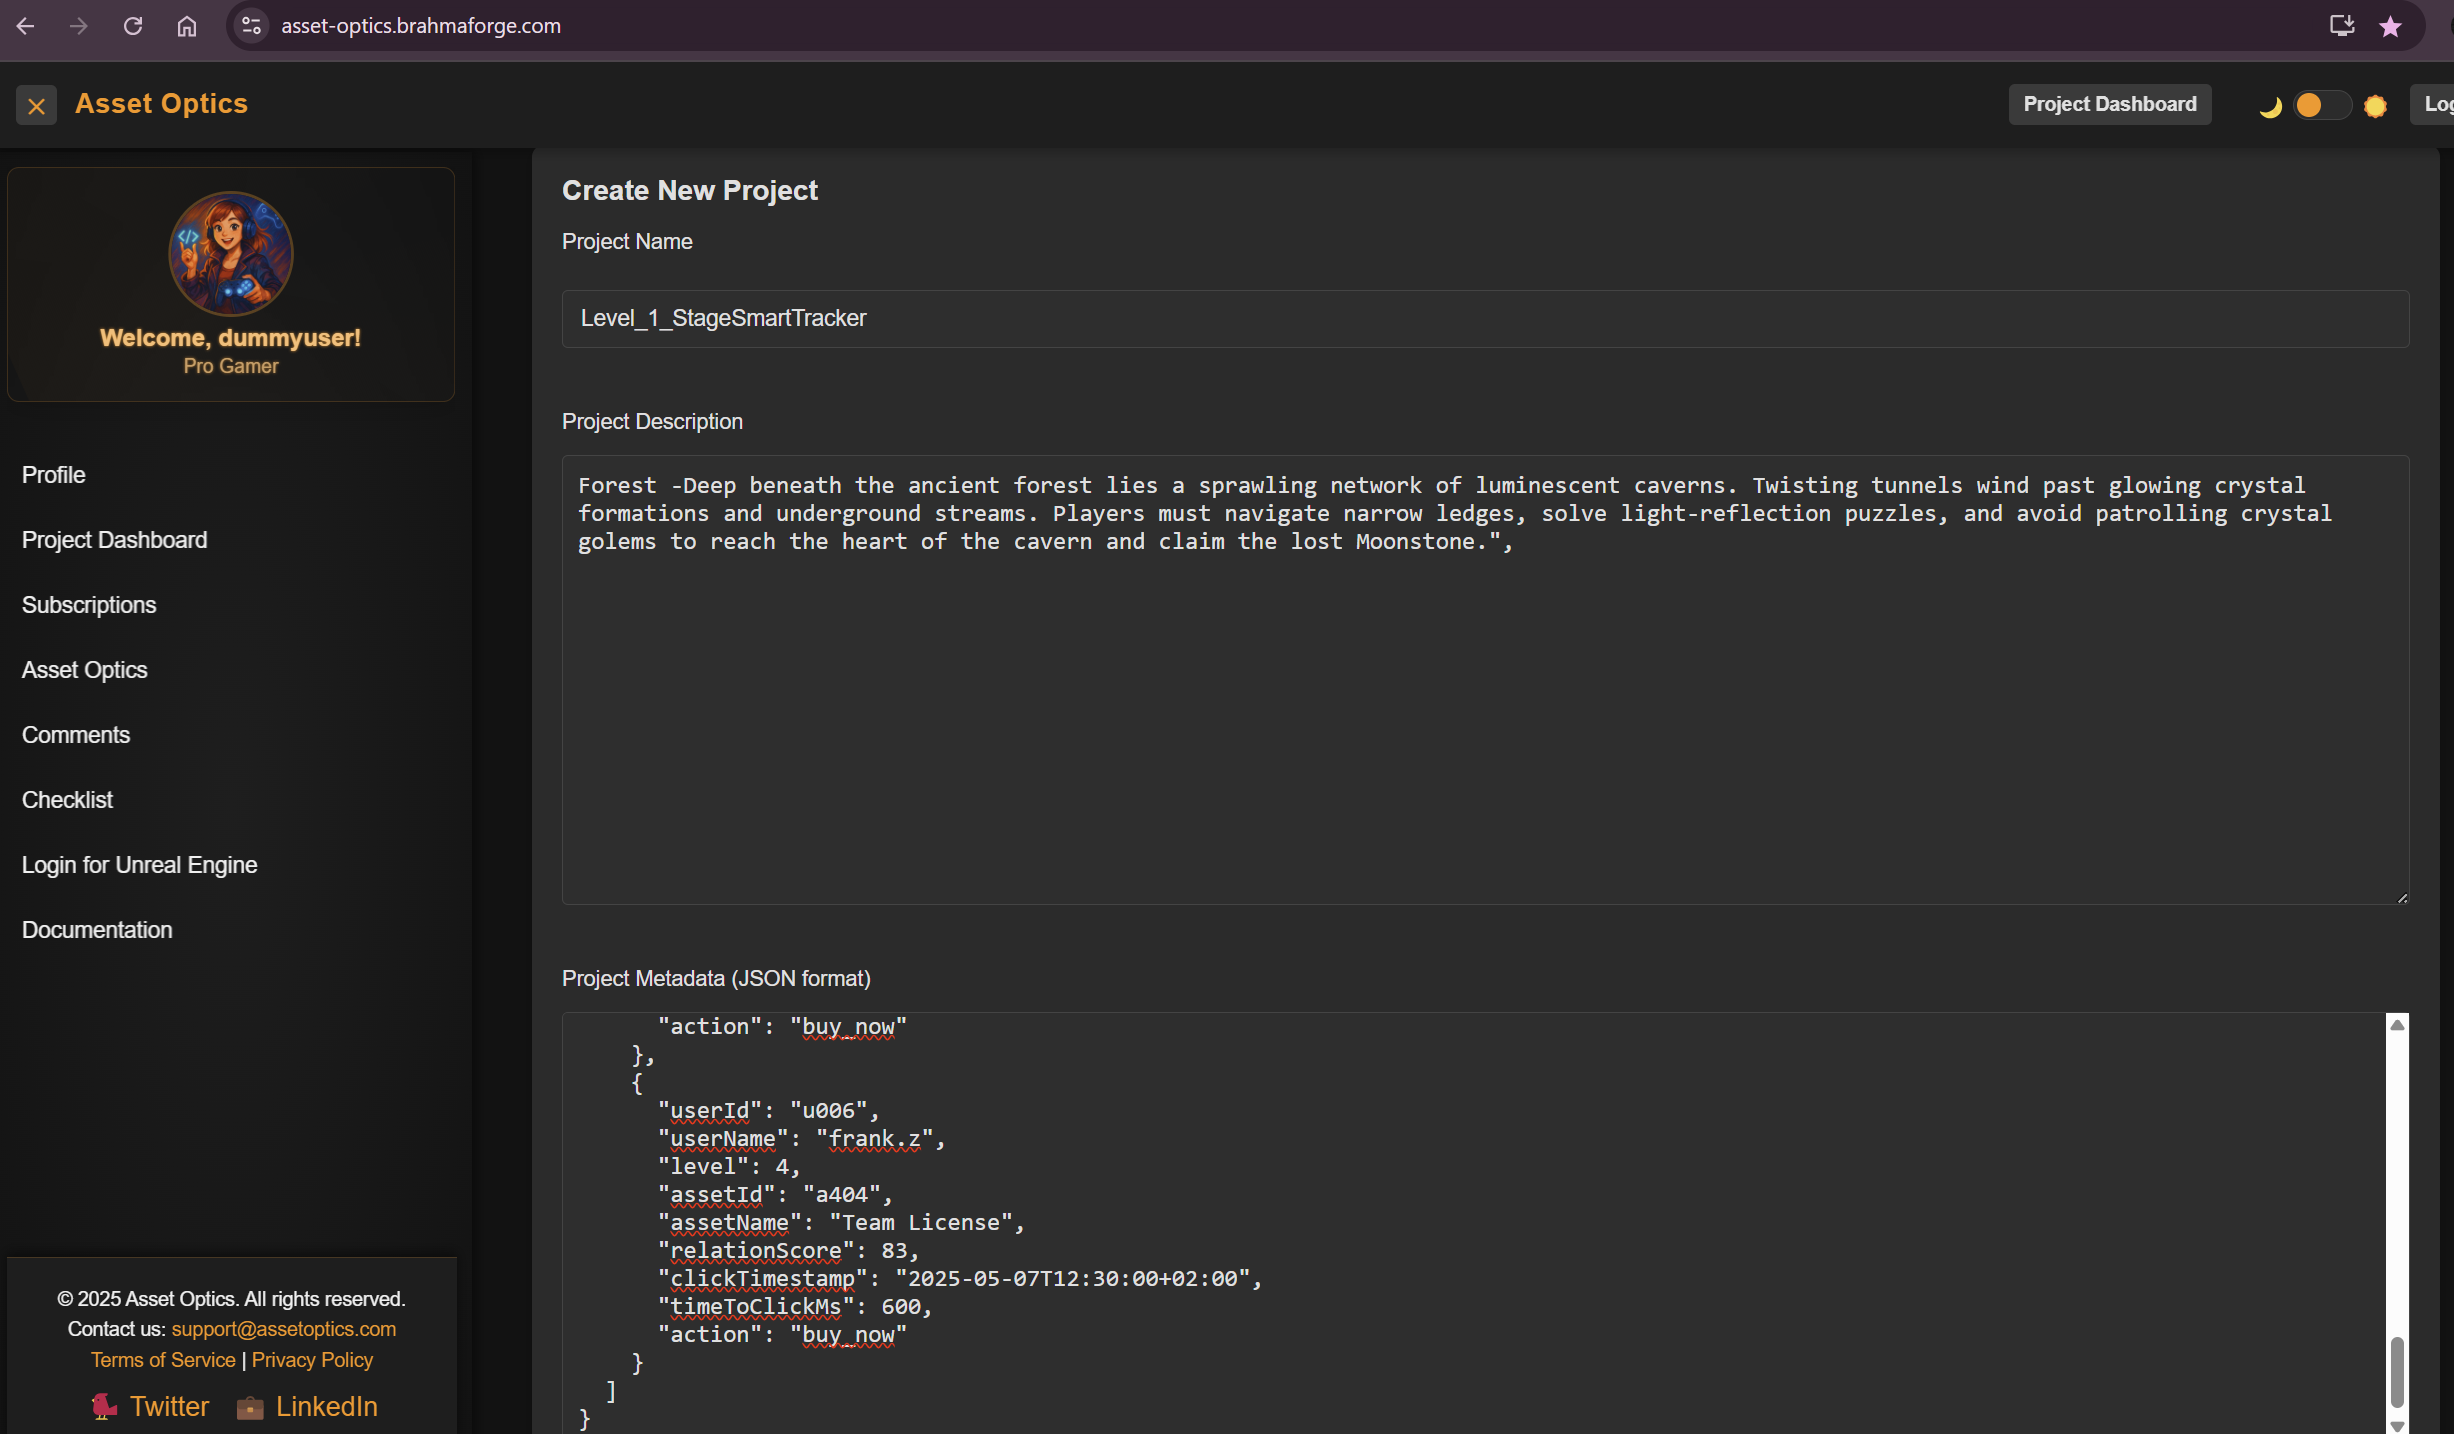
Creating Your First Project
- From the Asset Optics dashboard, click "Create New Project". Note: Projects are created in the webapp and sync to Unreal Engine.
- Enter a project name and description.
- Click "Create Project".
- You can add checklist and comment from the content drawer in Unreal engine.

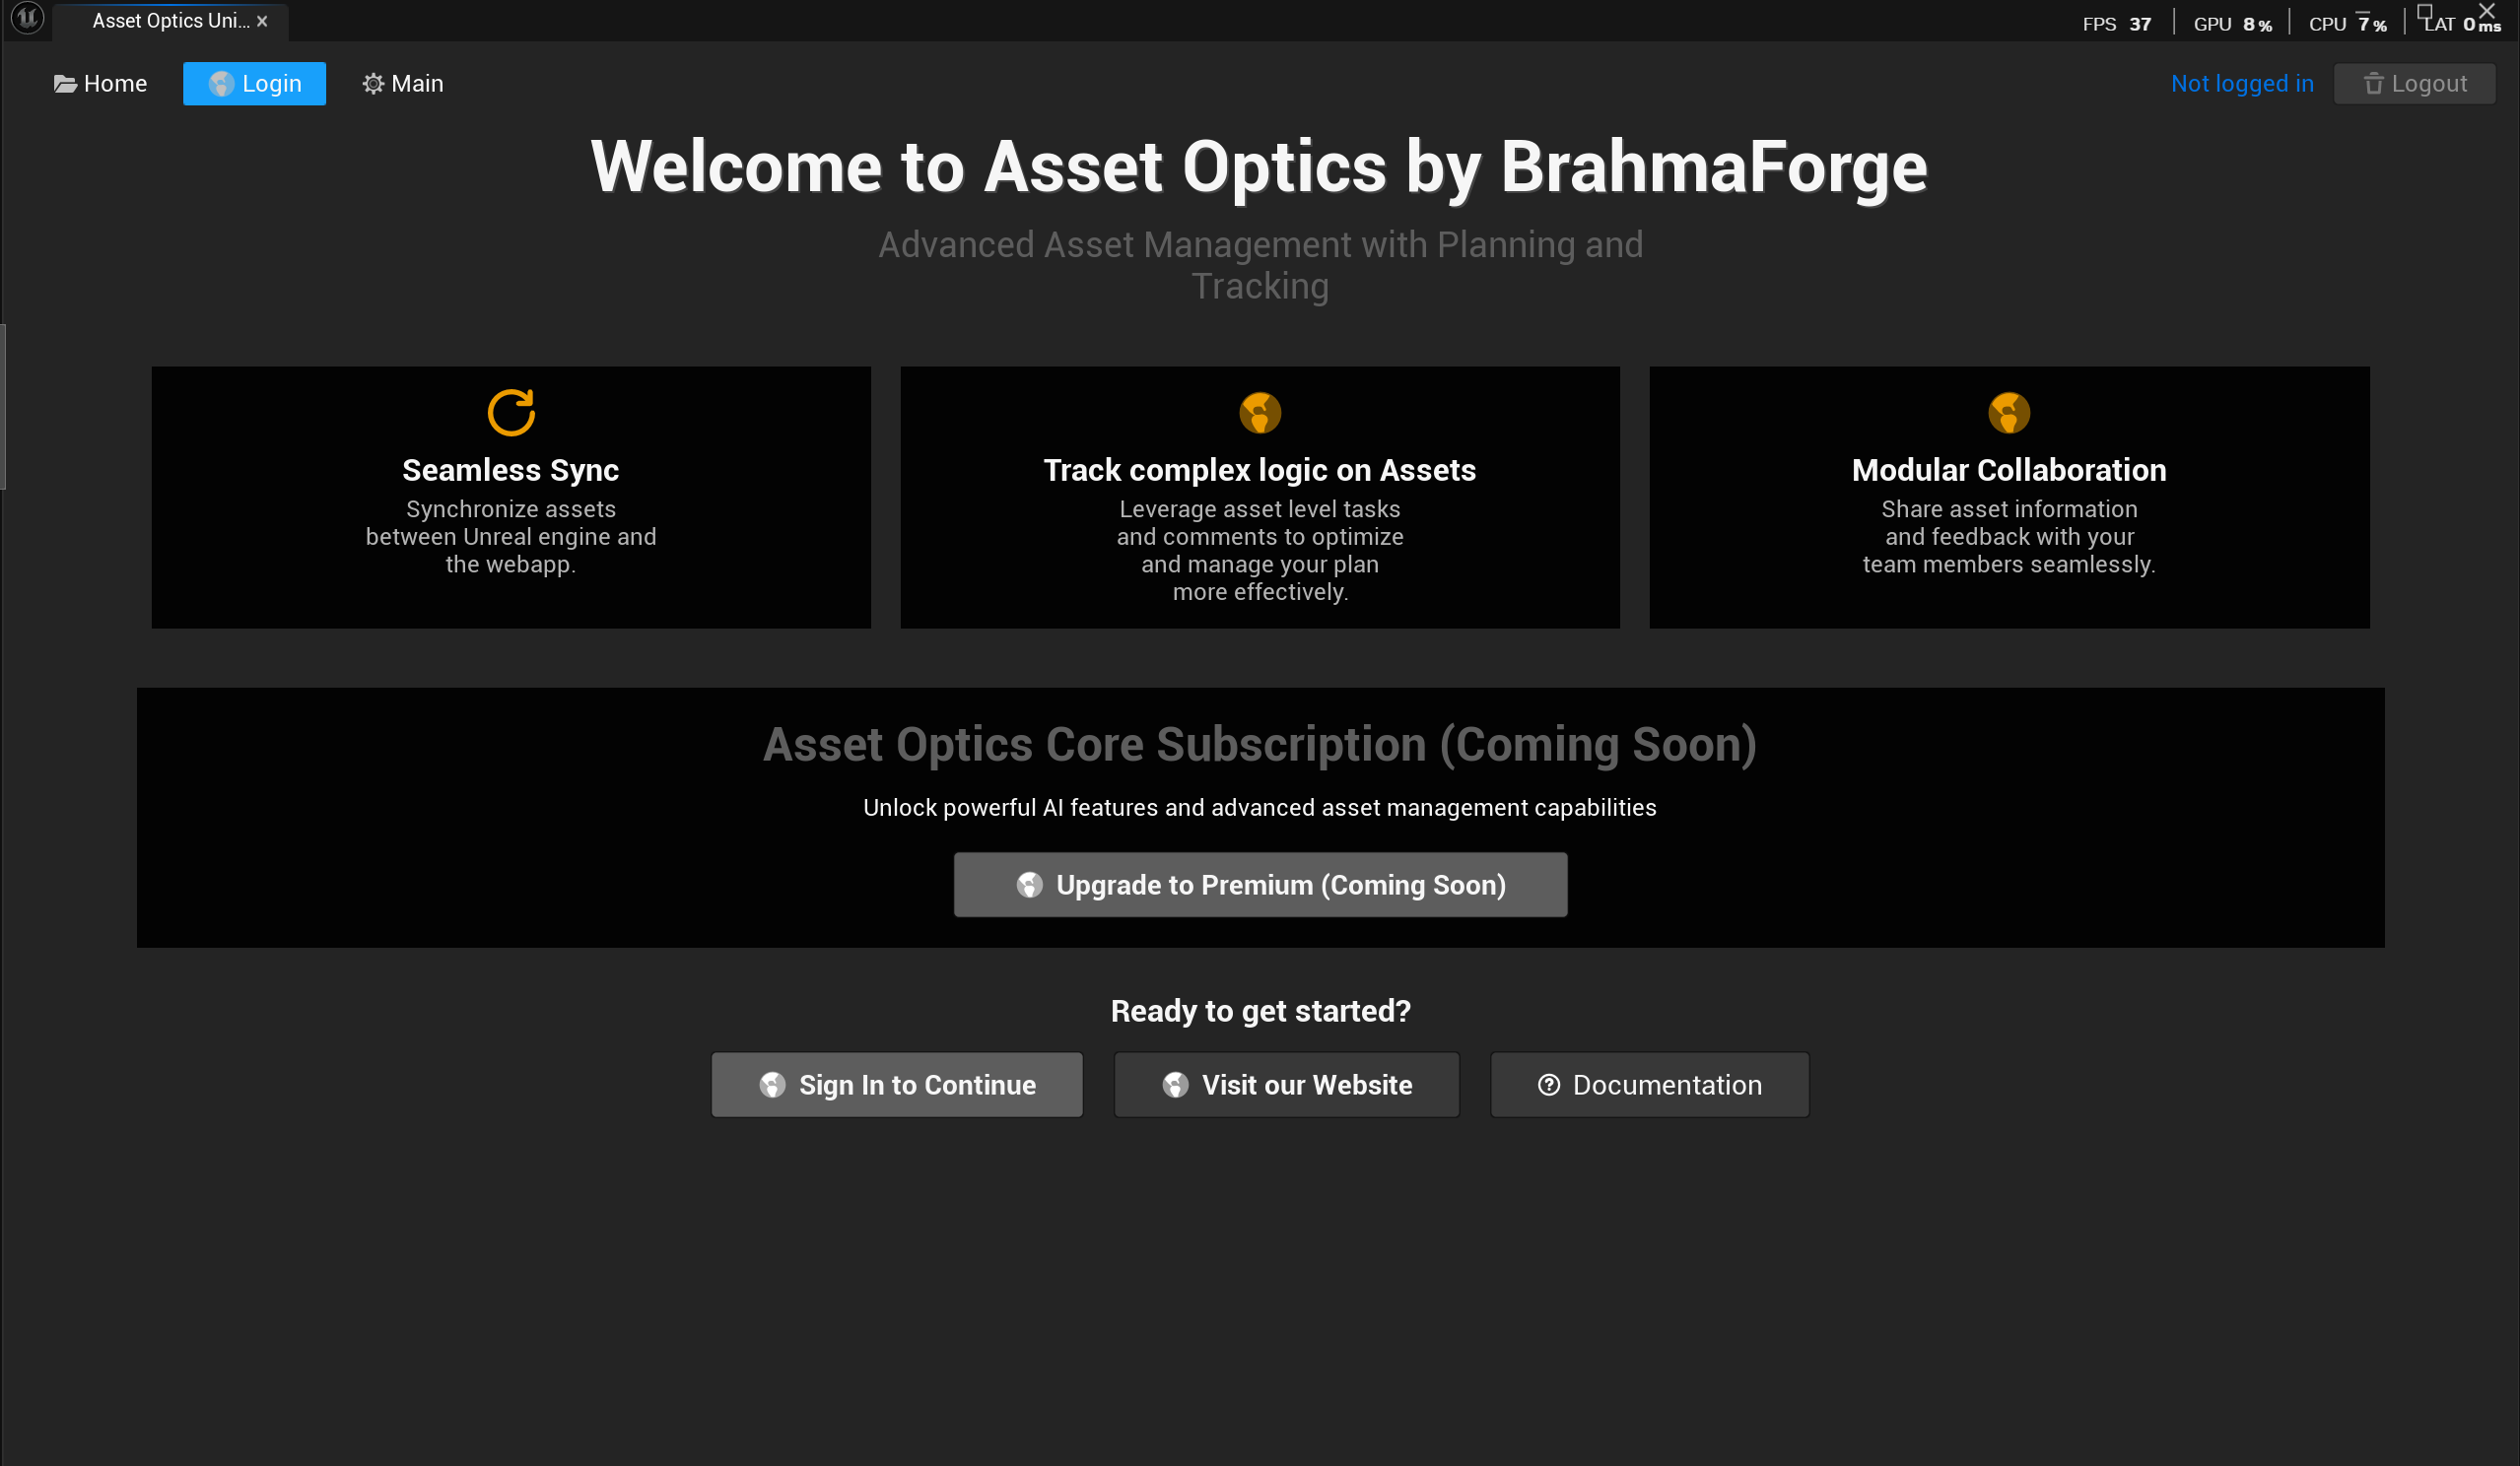
Login to Unreal Engine
Only required the first time you connect the plugin.
Login Steps
- To login in Unreal Engine, go to your Home page → Windows → Open Asset Optics.
- On the Asset Optics landing page, click "Login to continue".
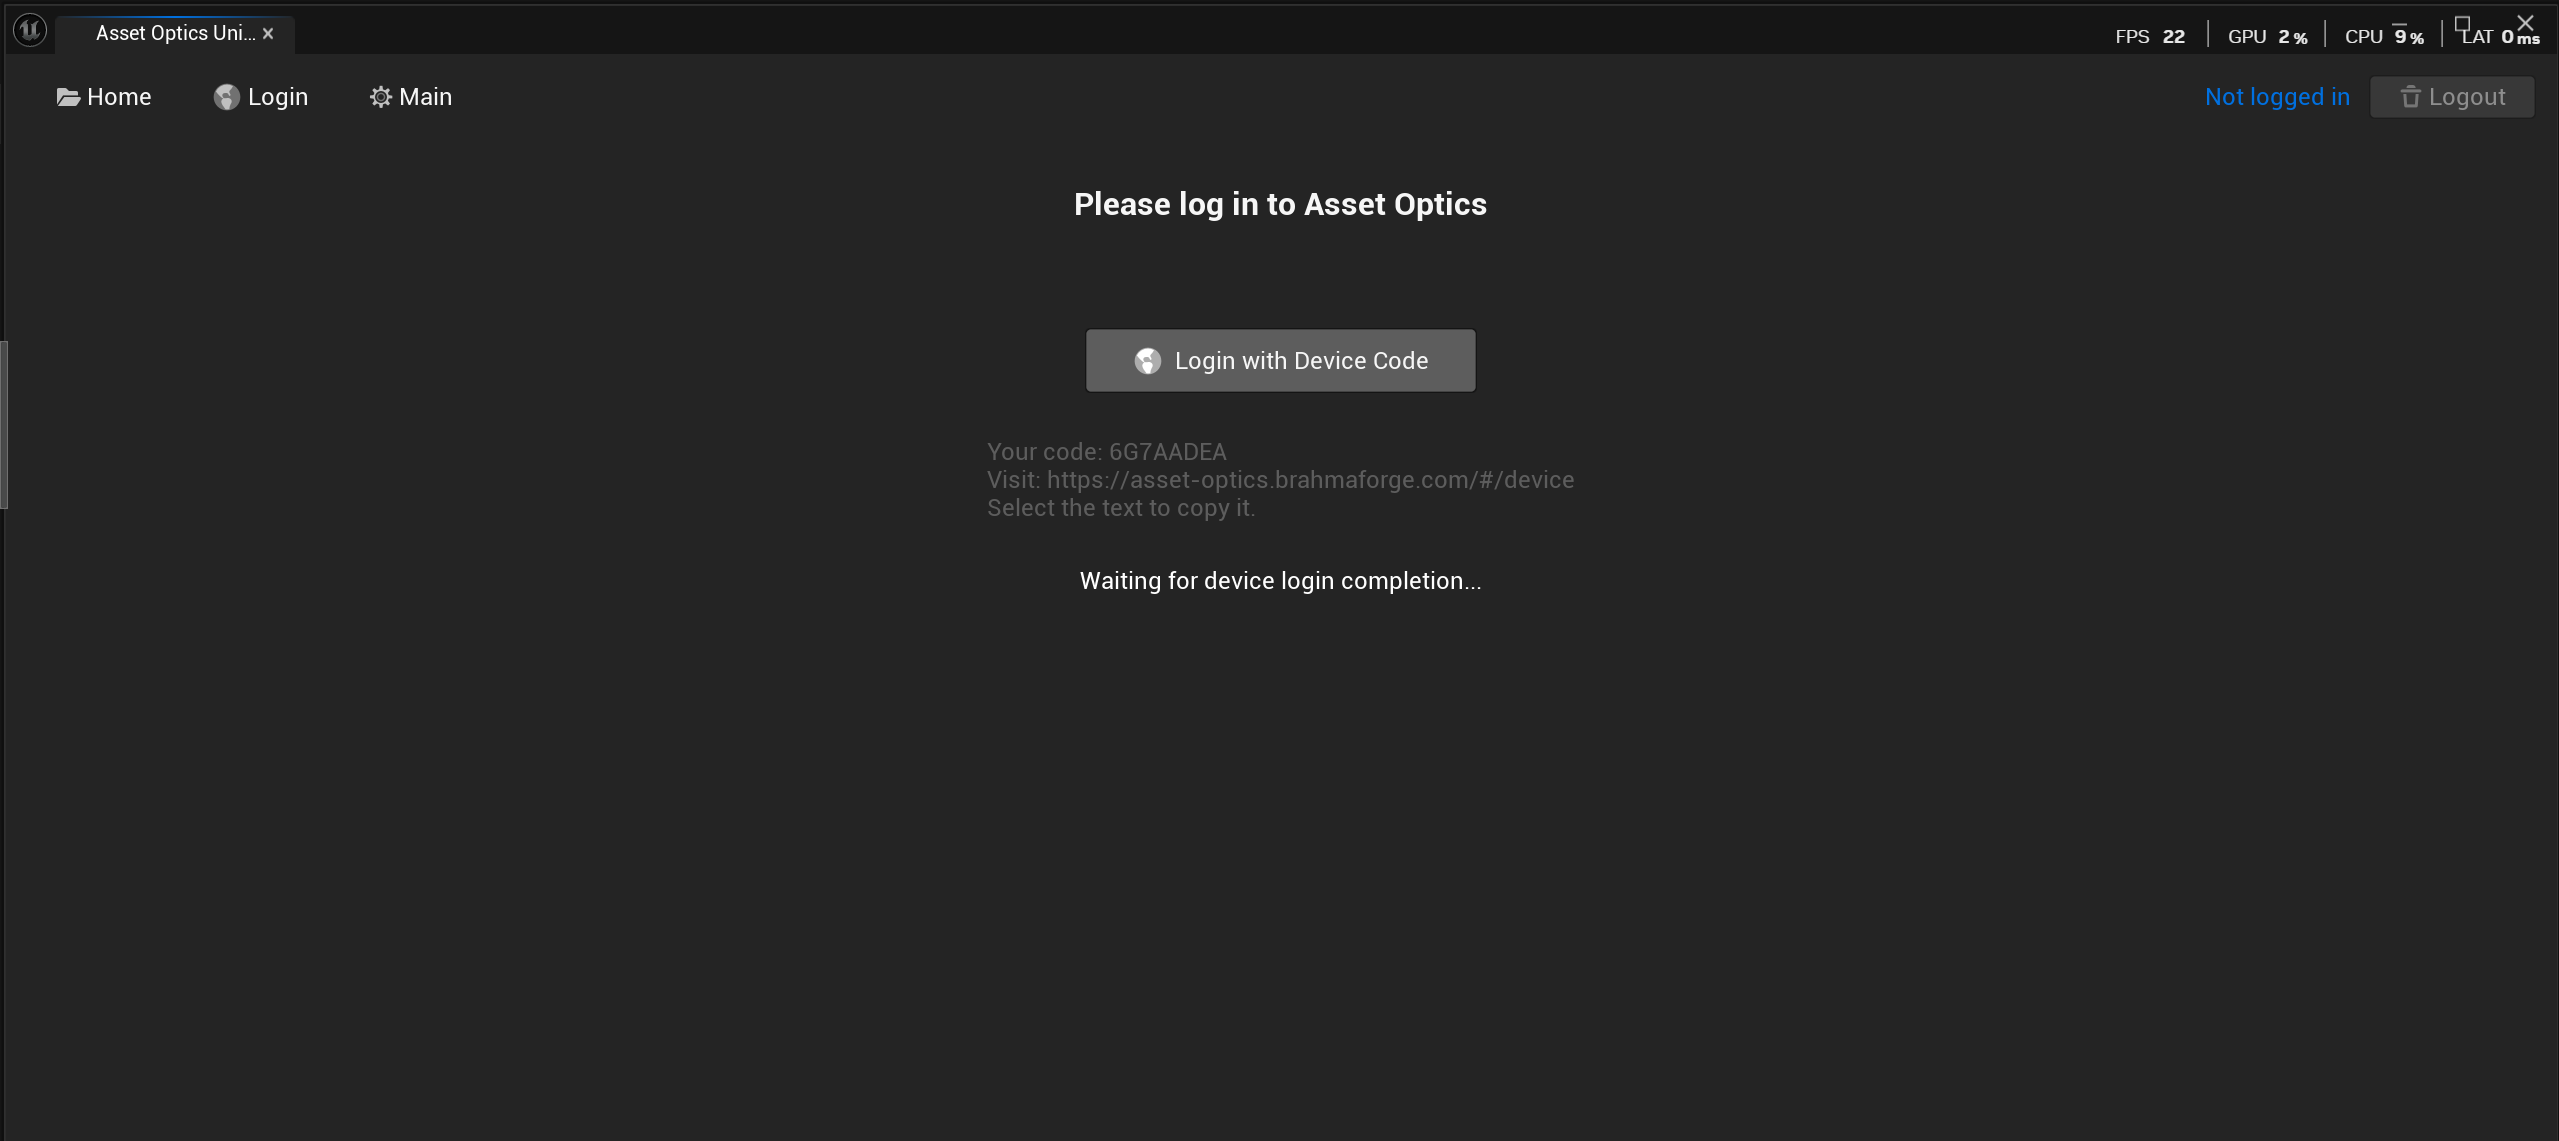
- On the next screen, choose "Login with Device Code".
- Copy the displayed code.
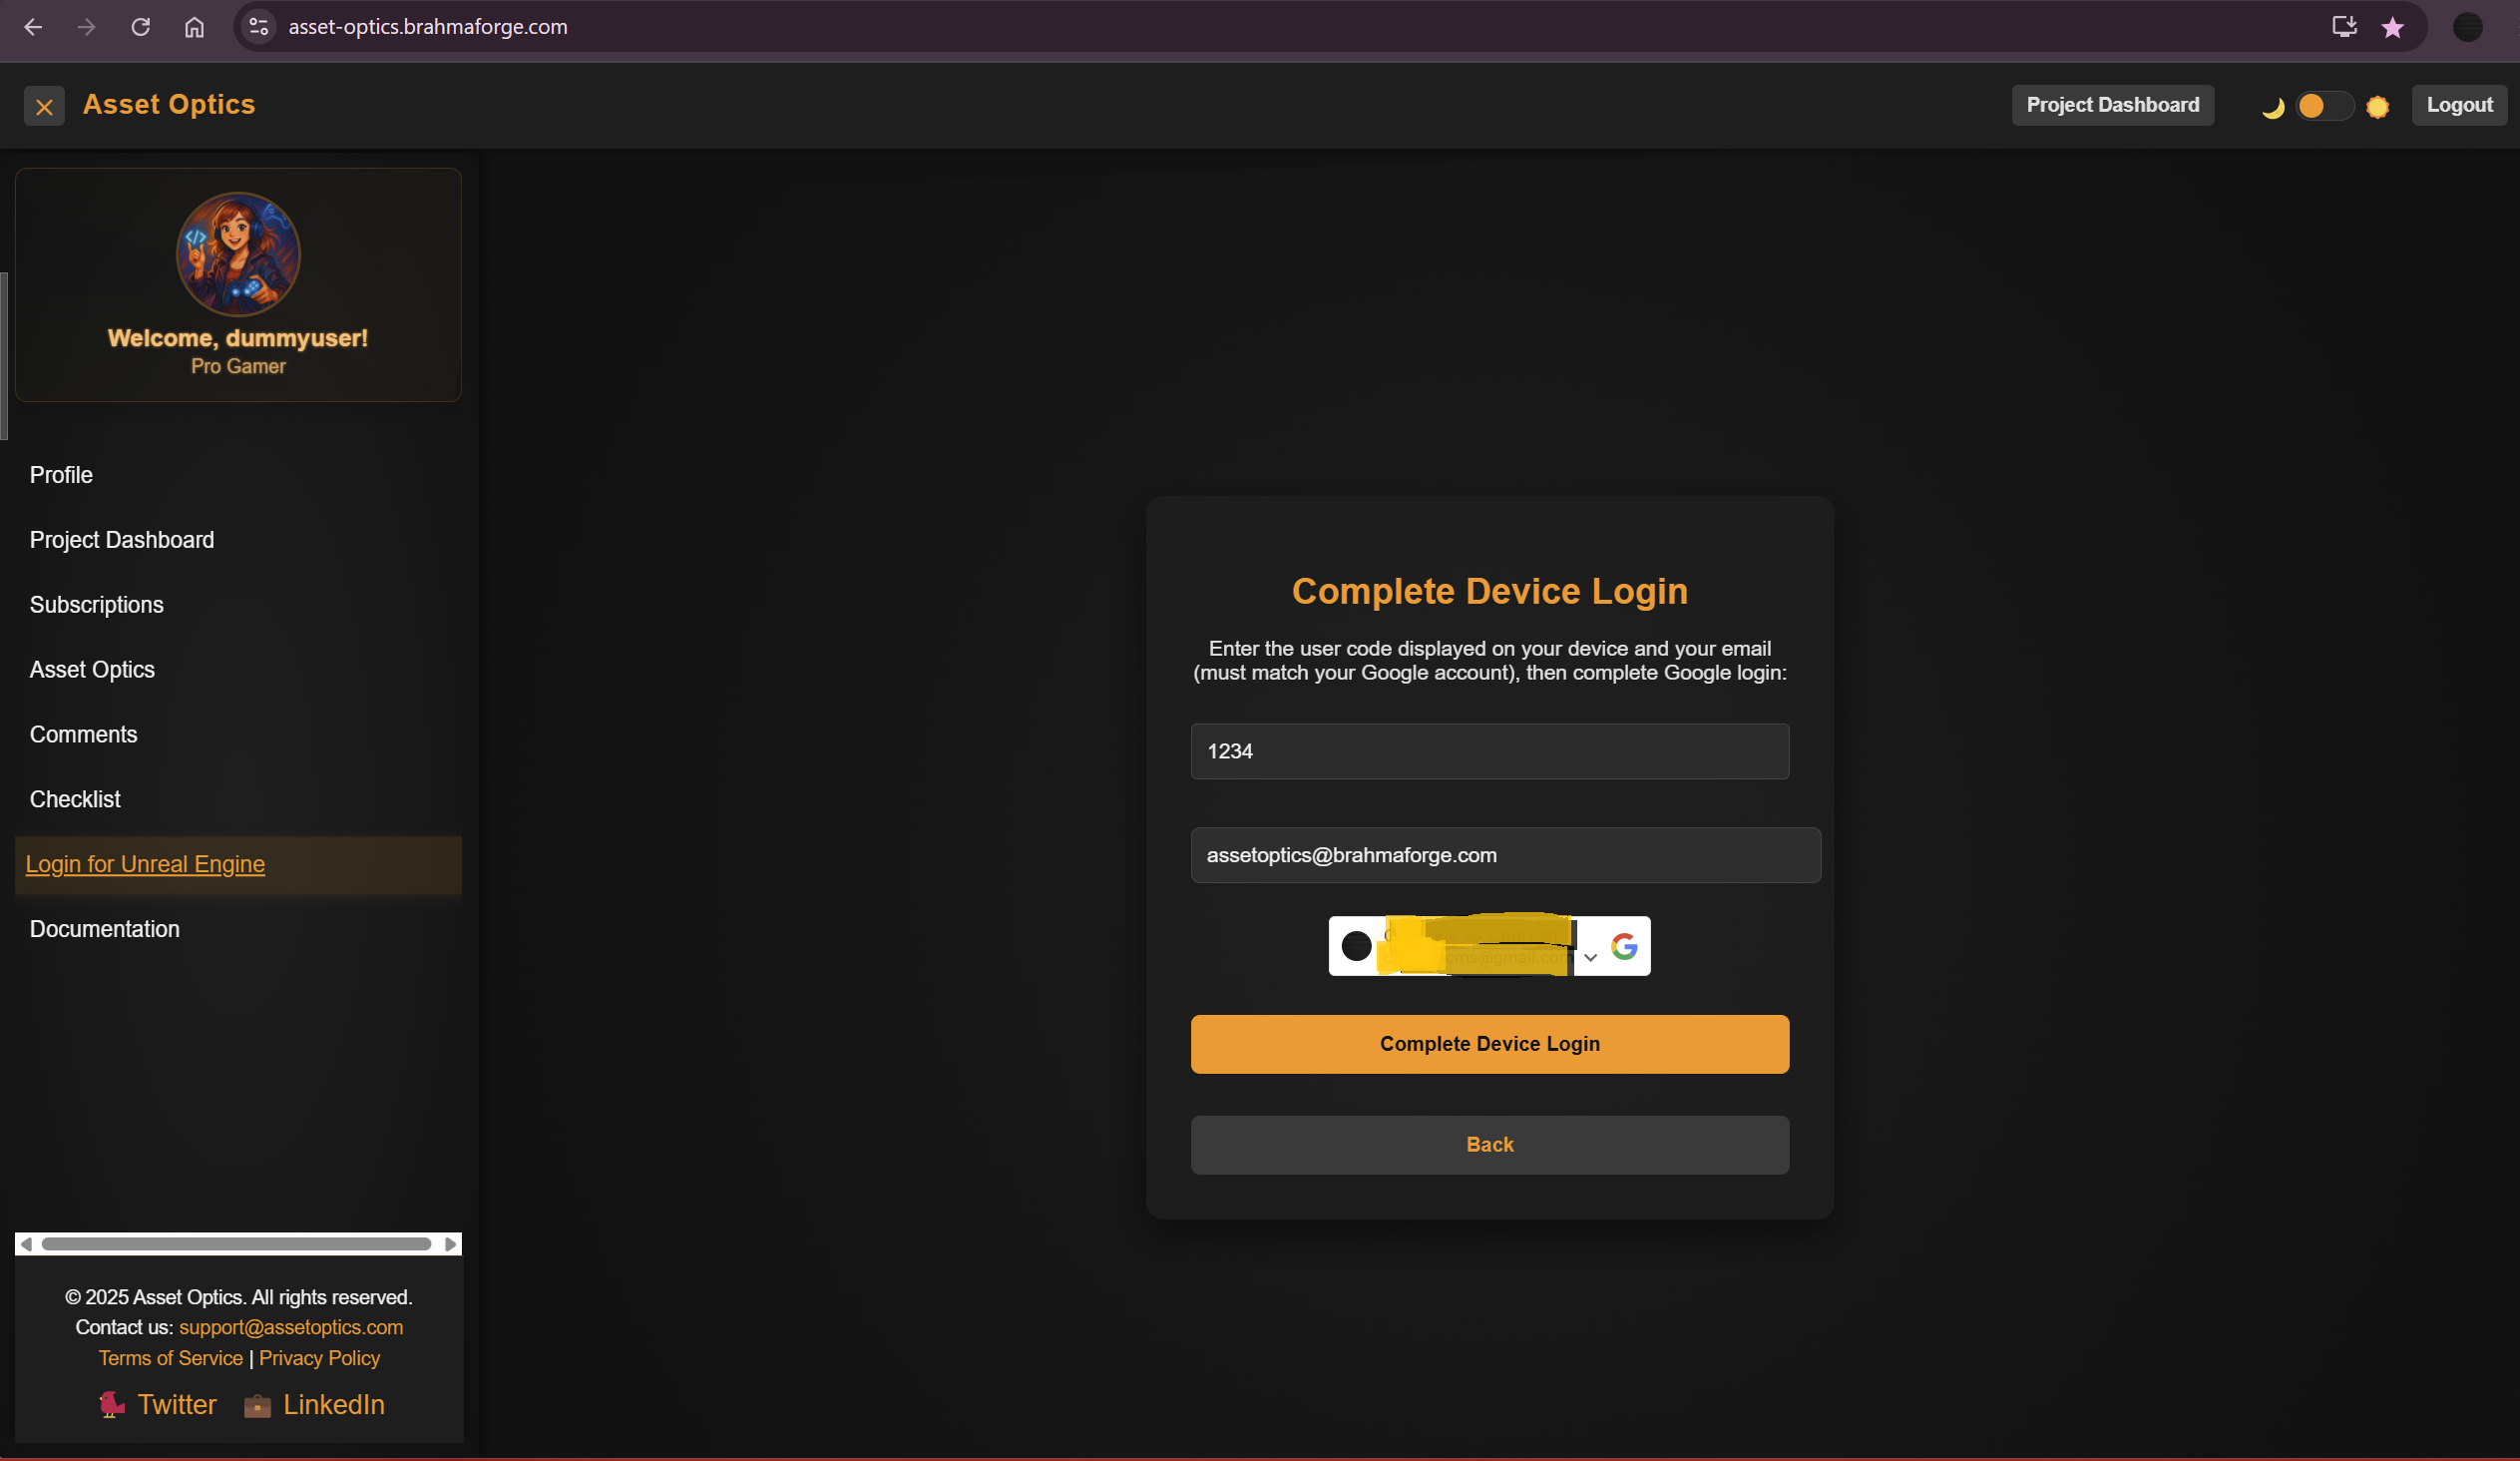
- In the Asset Optics webapp sidebar, click "Login to Unreal Engine", paste the code, and verify.
- Click "Login" to authenticate.
- Once verified, your Unreal Engine plugin is linked—ready to use!
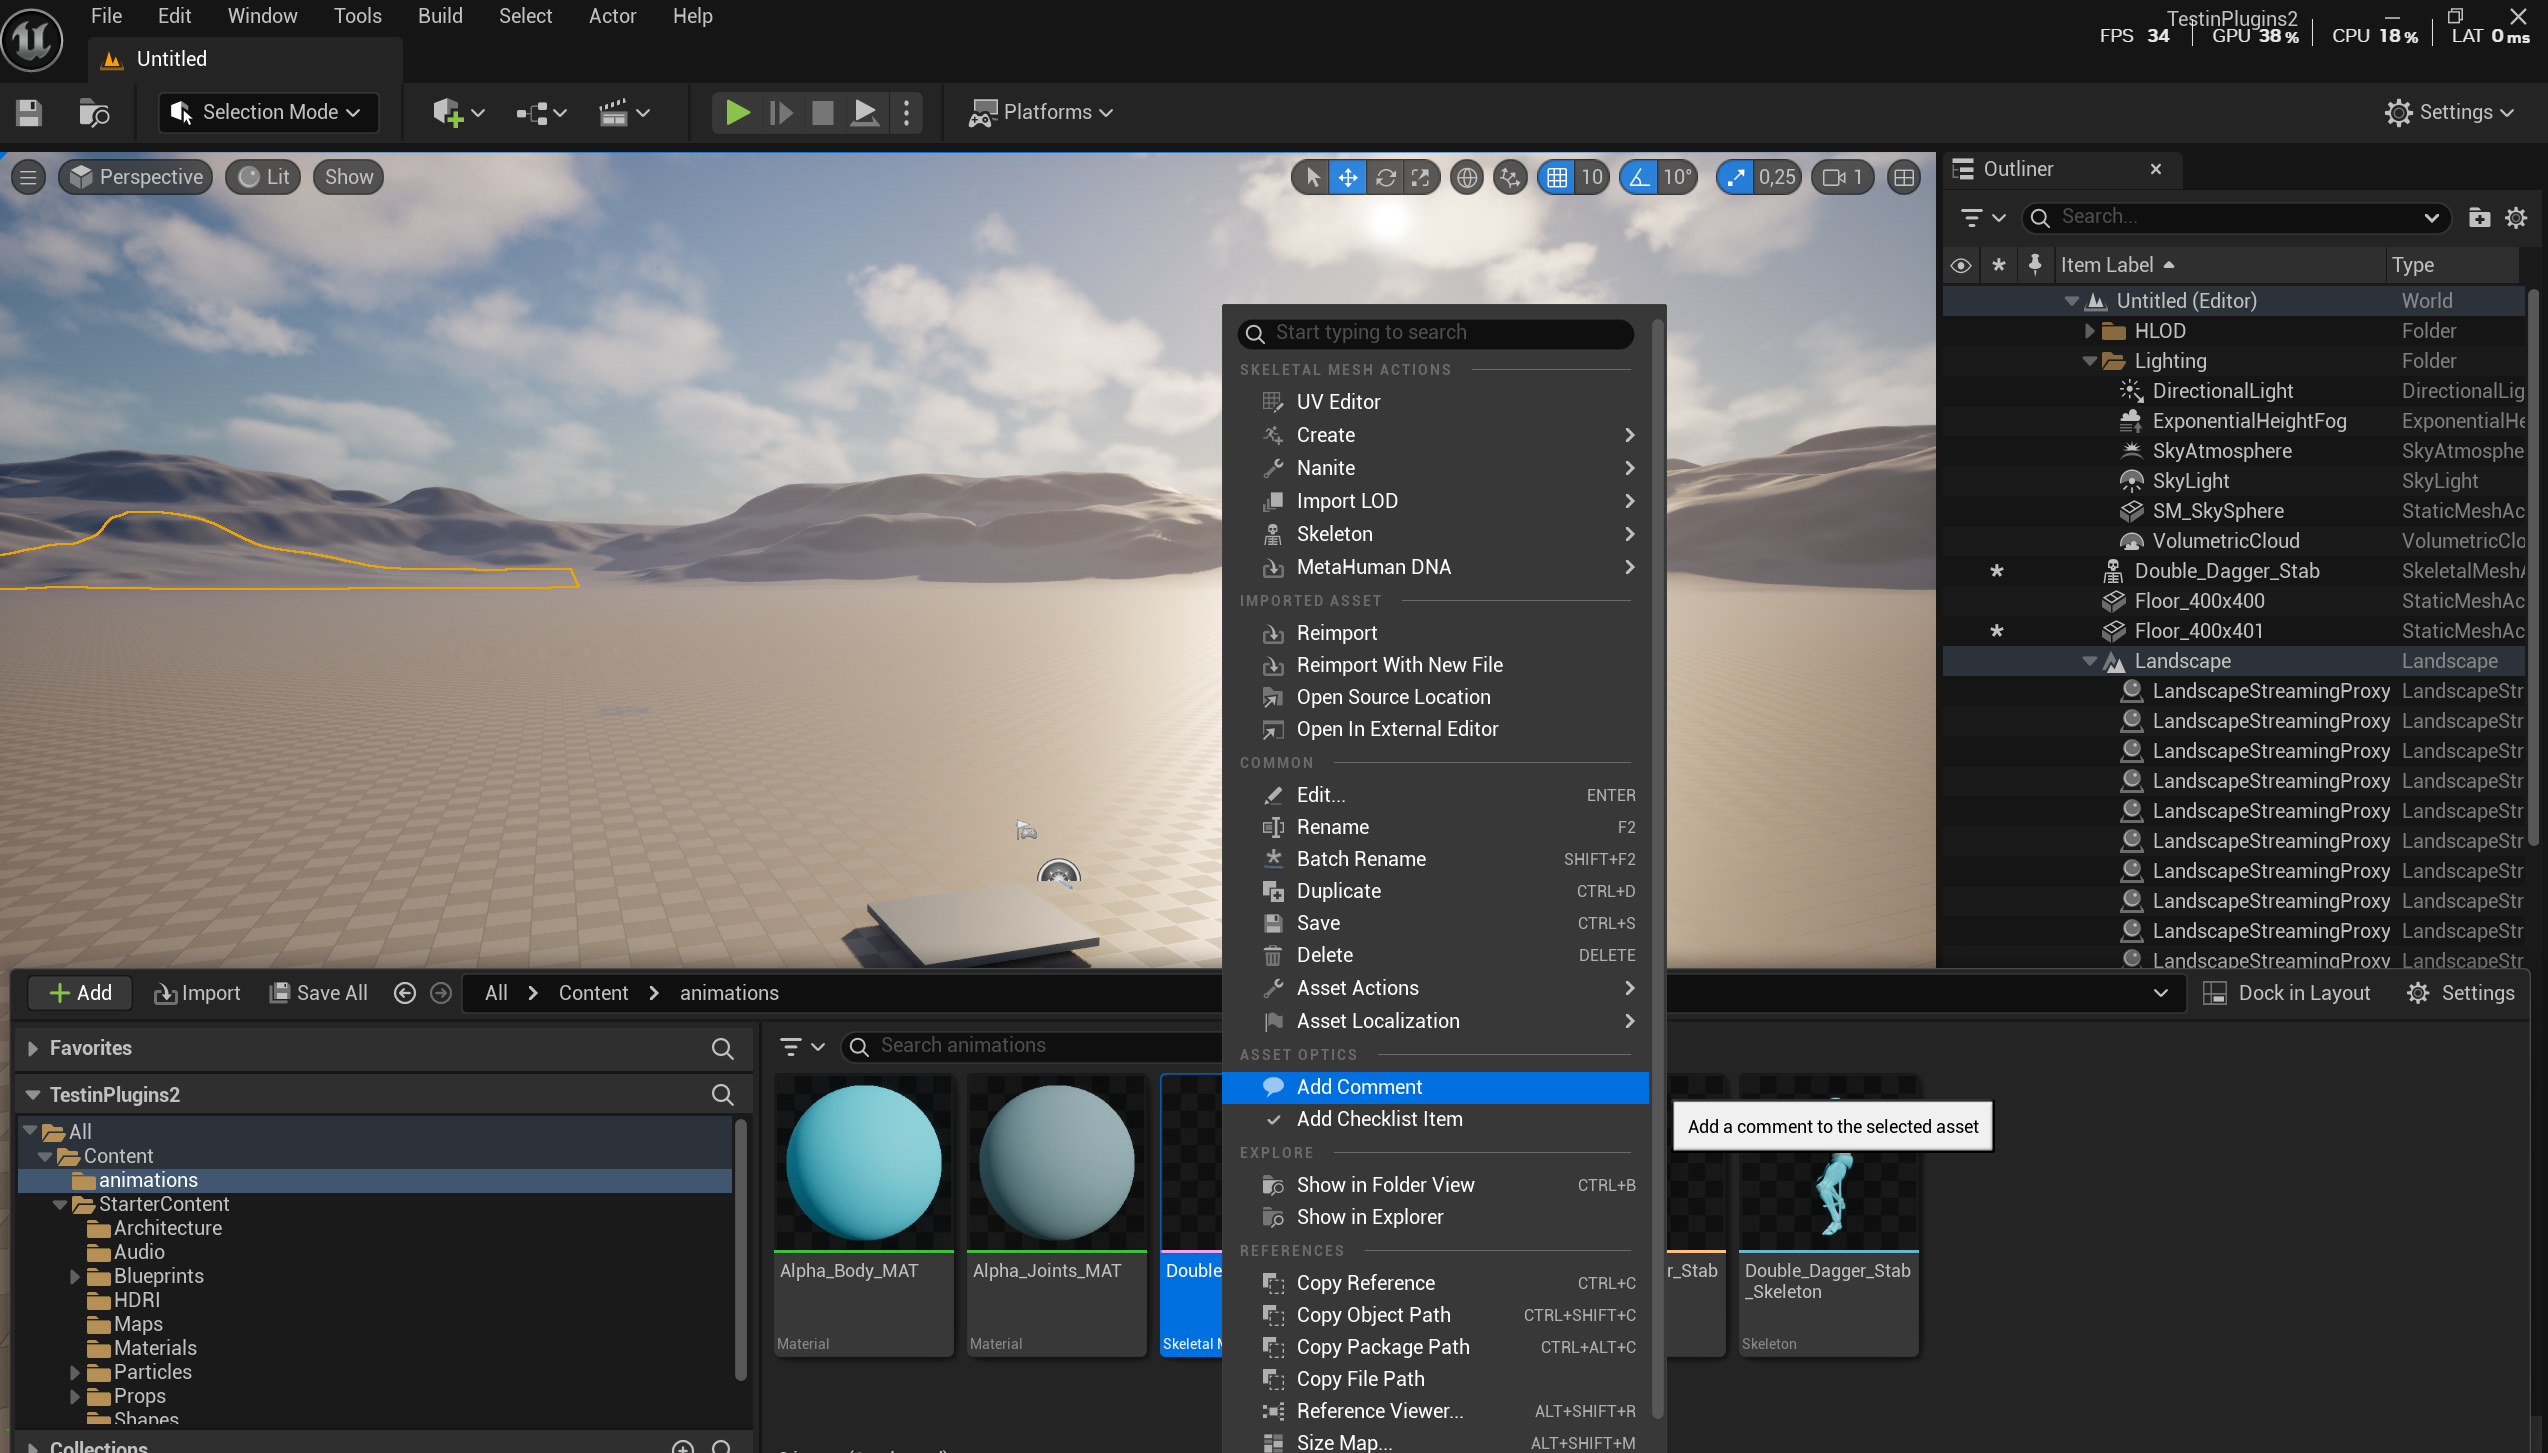
Track & Annotate Assets in Unreal Engine
How to Track & Annotate
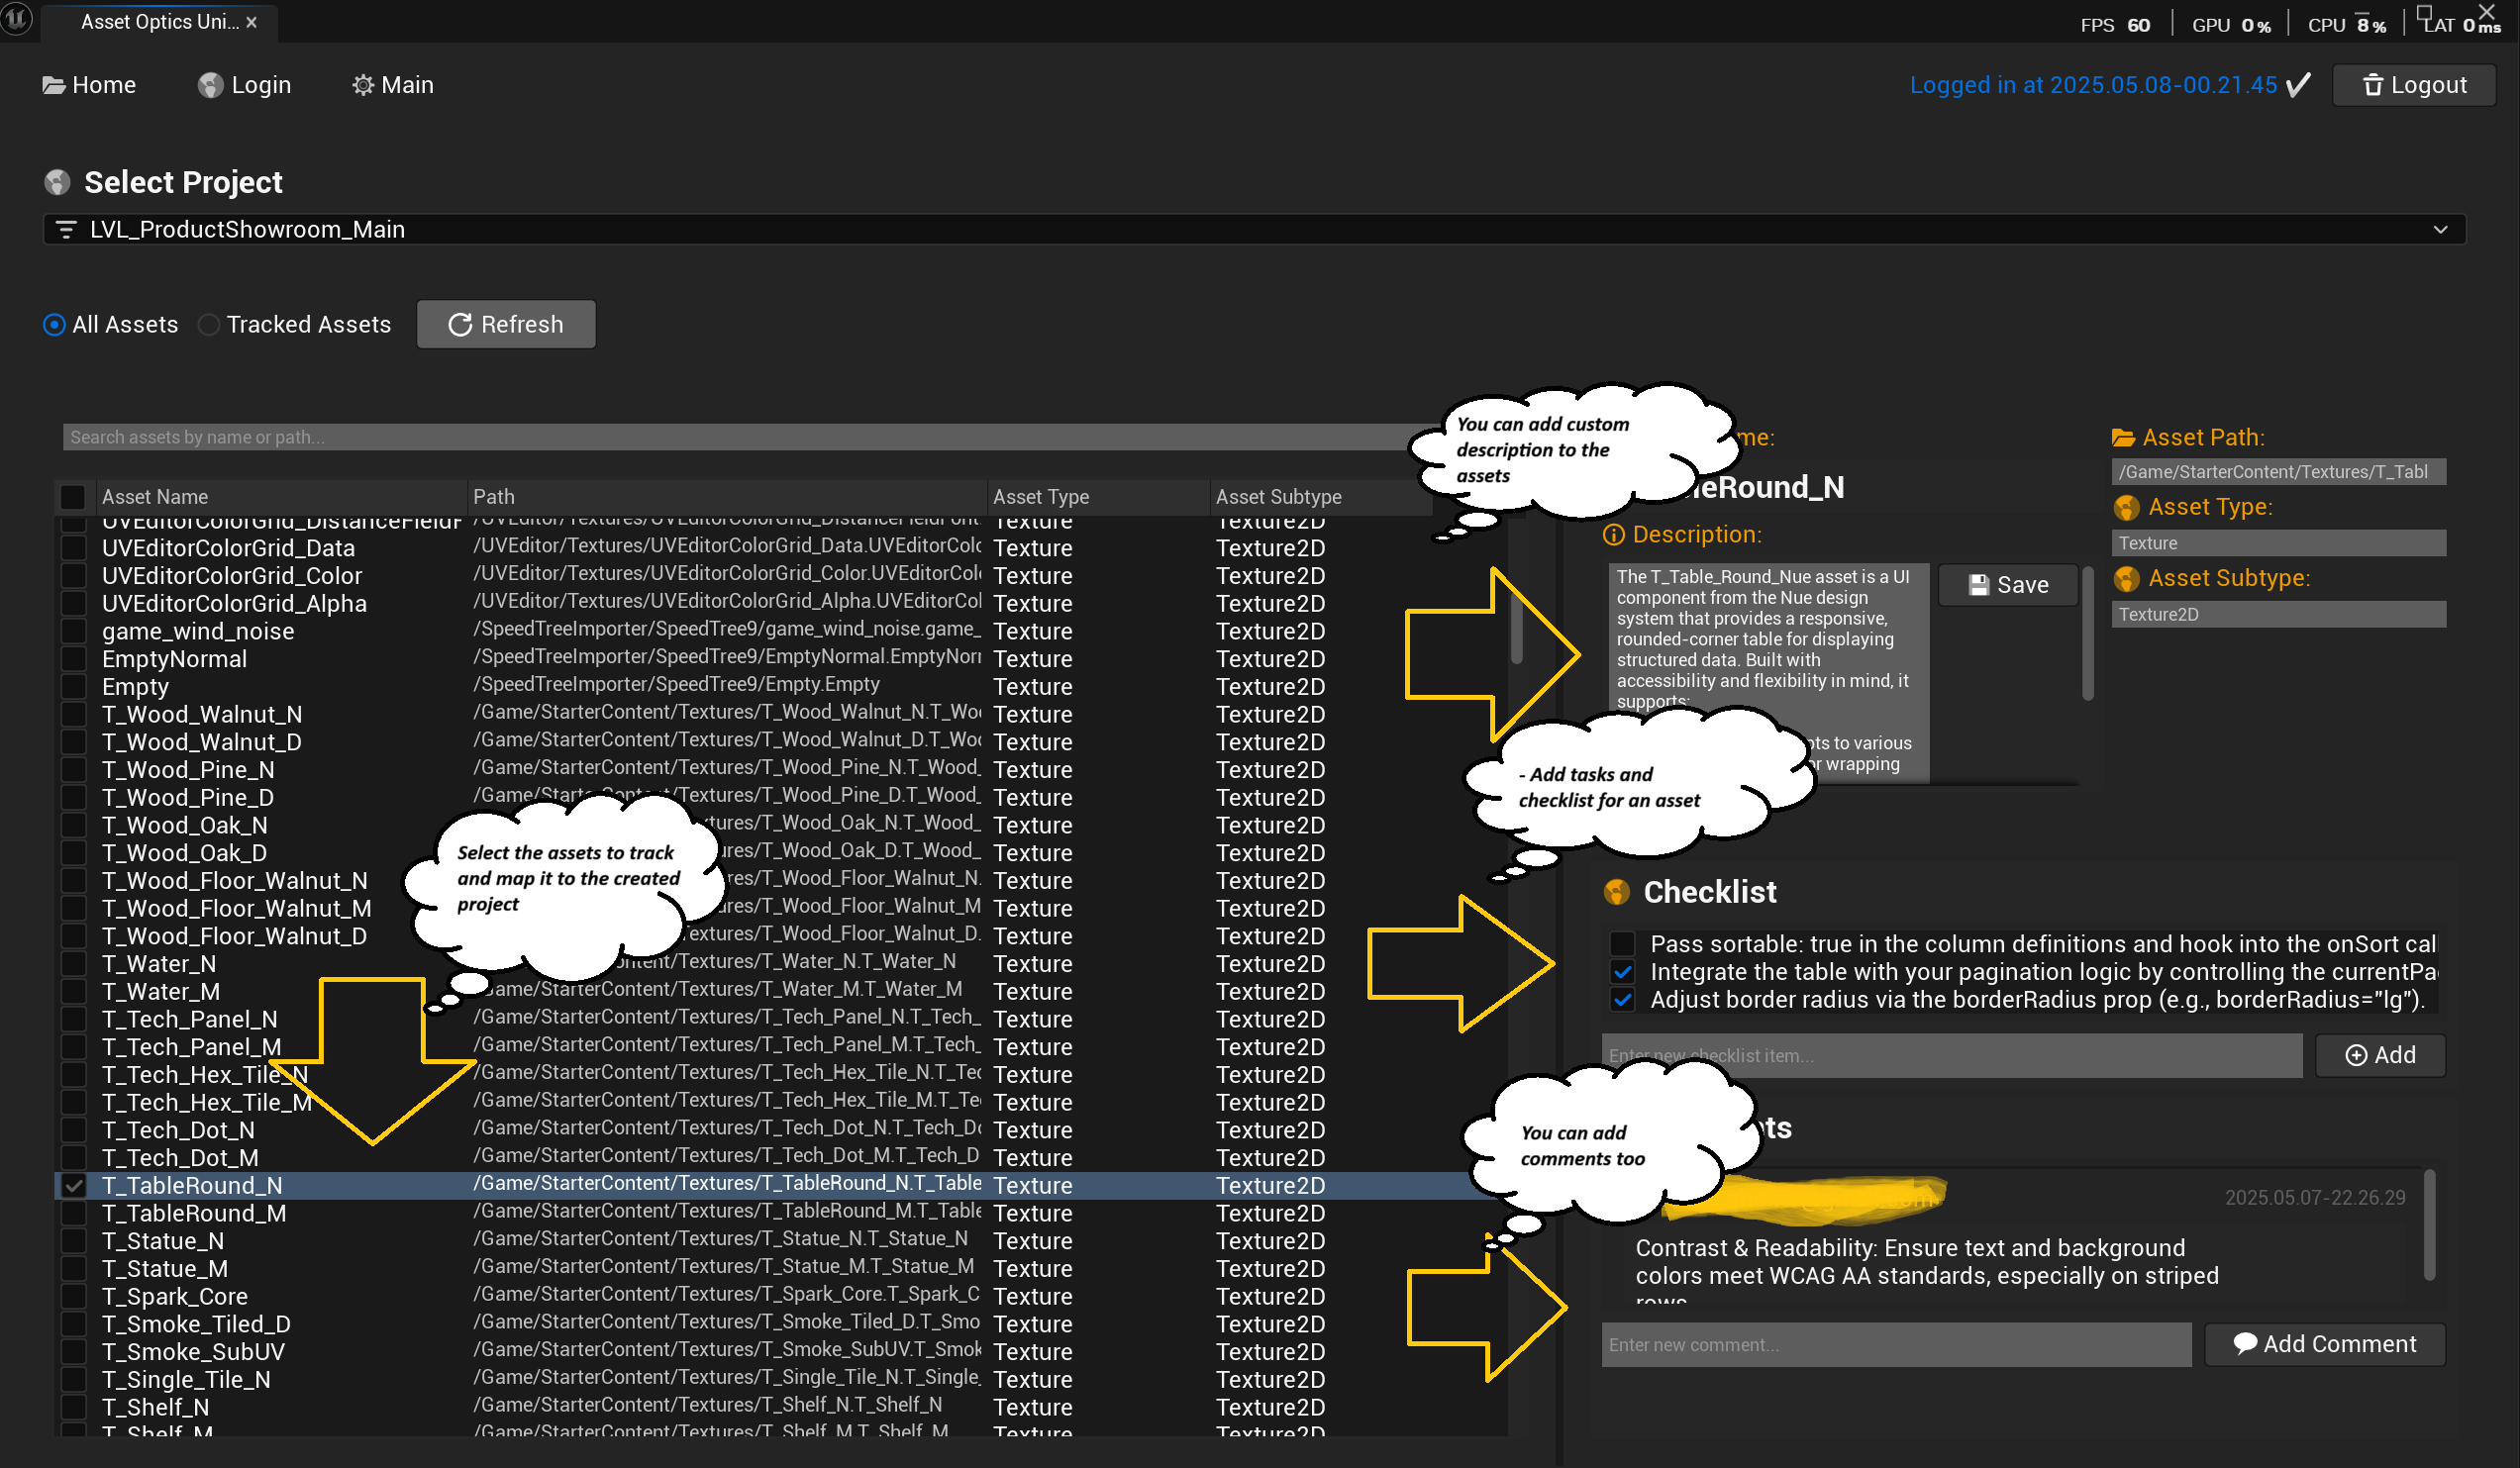
- Open the Asset Optics panel in Unreal Engine to see all local assets.
- Assign assets to a project by checking the box next to each item.
- To add a description, click the asset name, choose "Edit Description", enter your text, and save.
- Use the search bar or filters to quickly find specific assets.
- You can add checklist and comment for an asset by clicking on "Add Comment" or "Add Checklist".
- All changes sync automatically to the webapp.
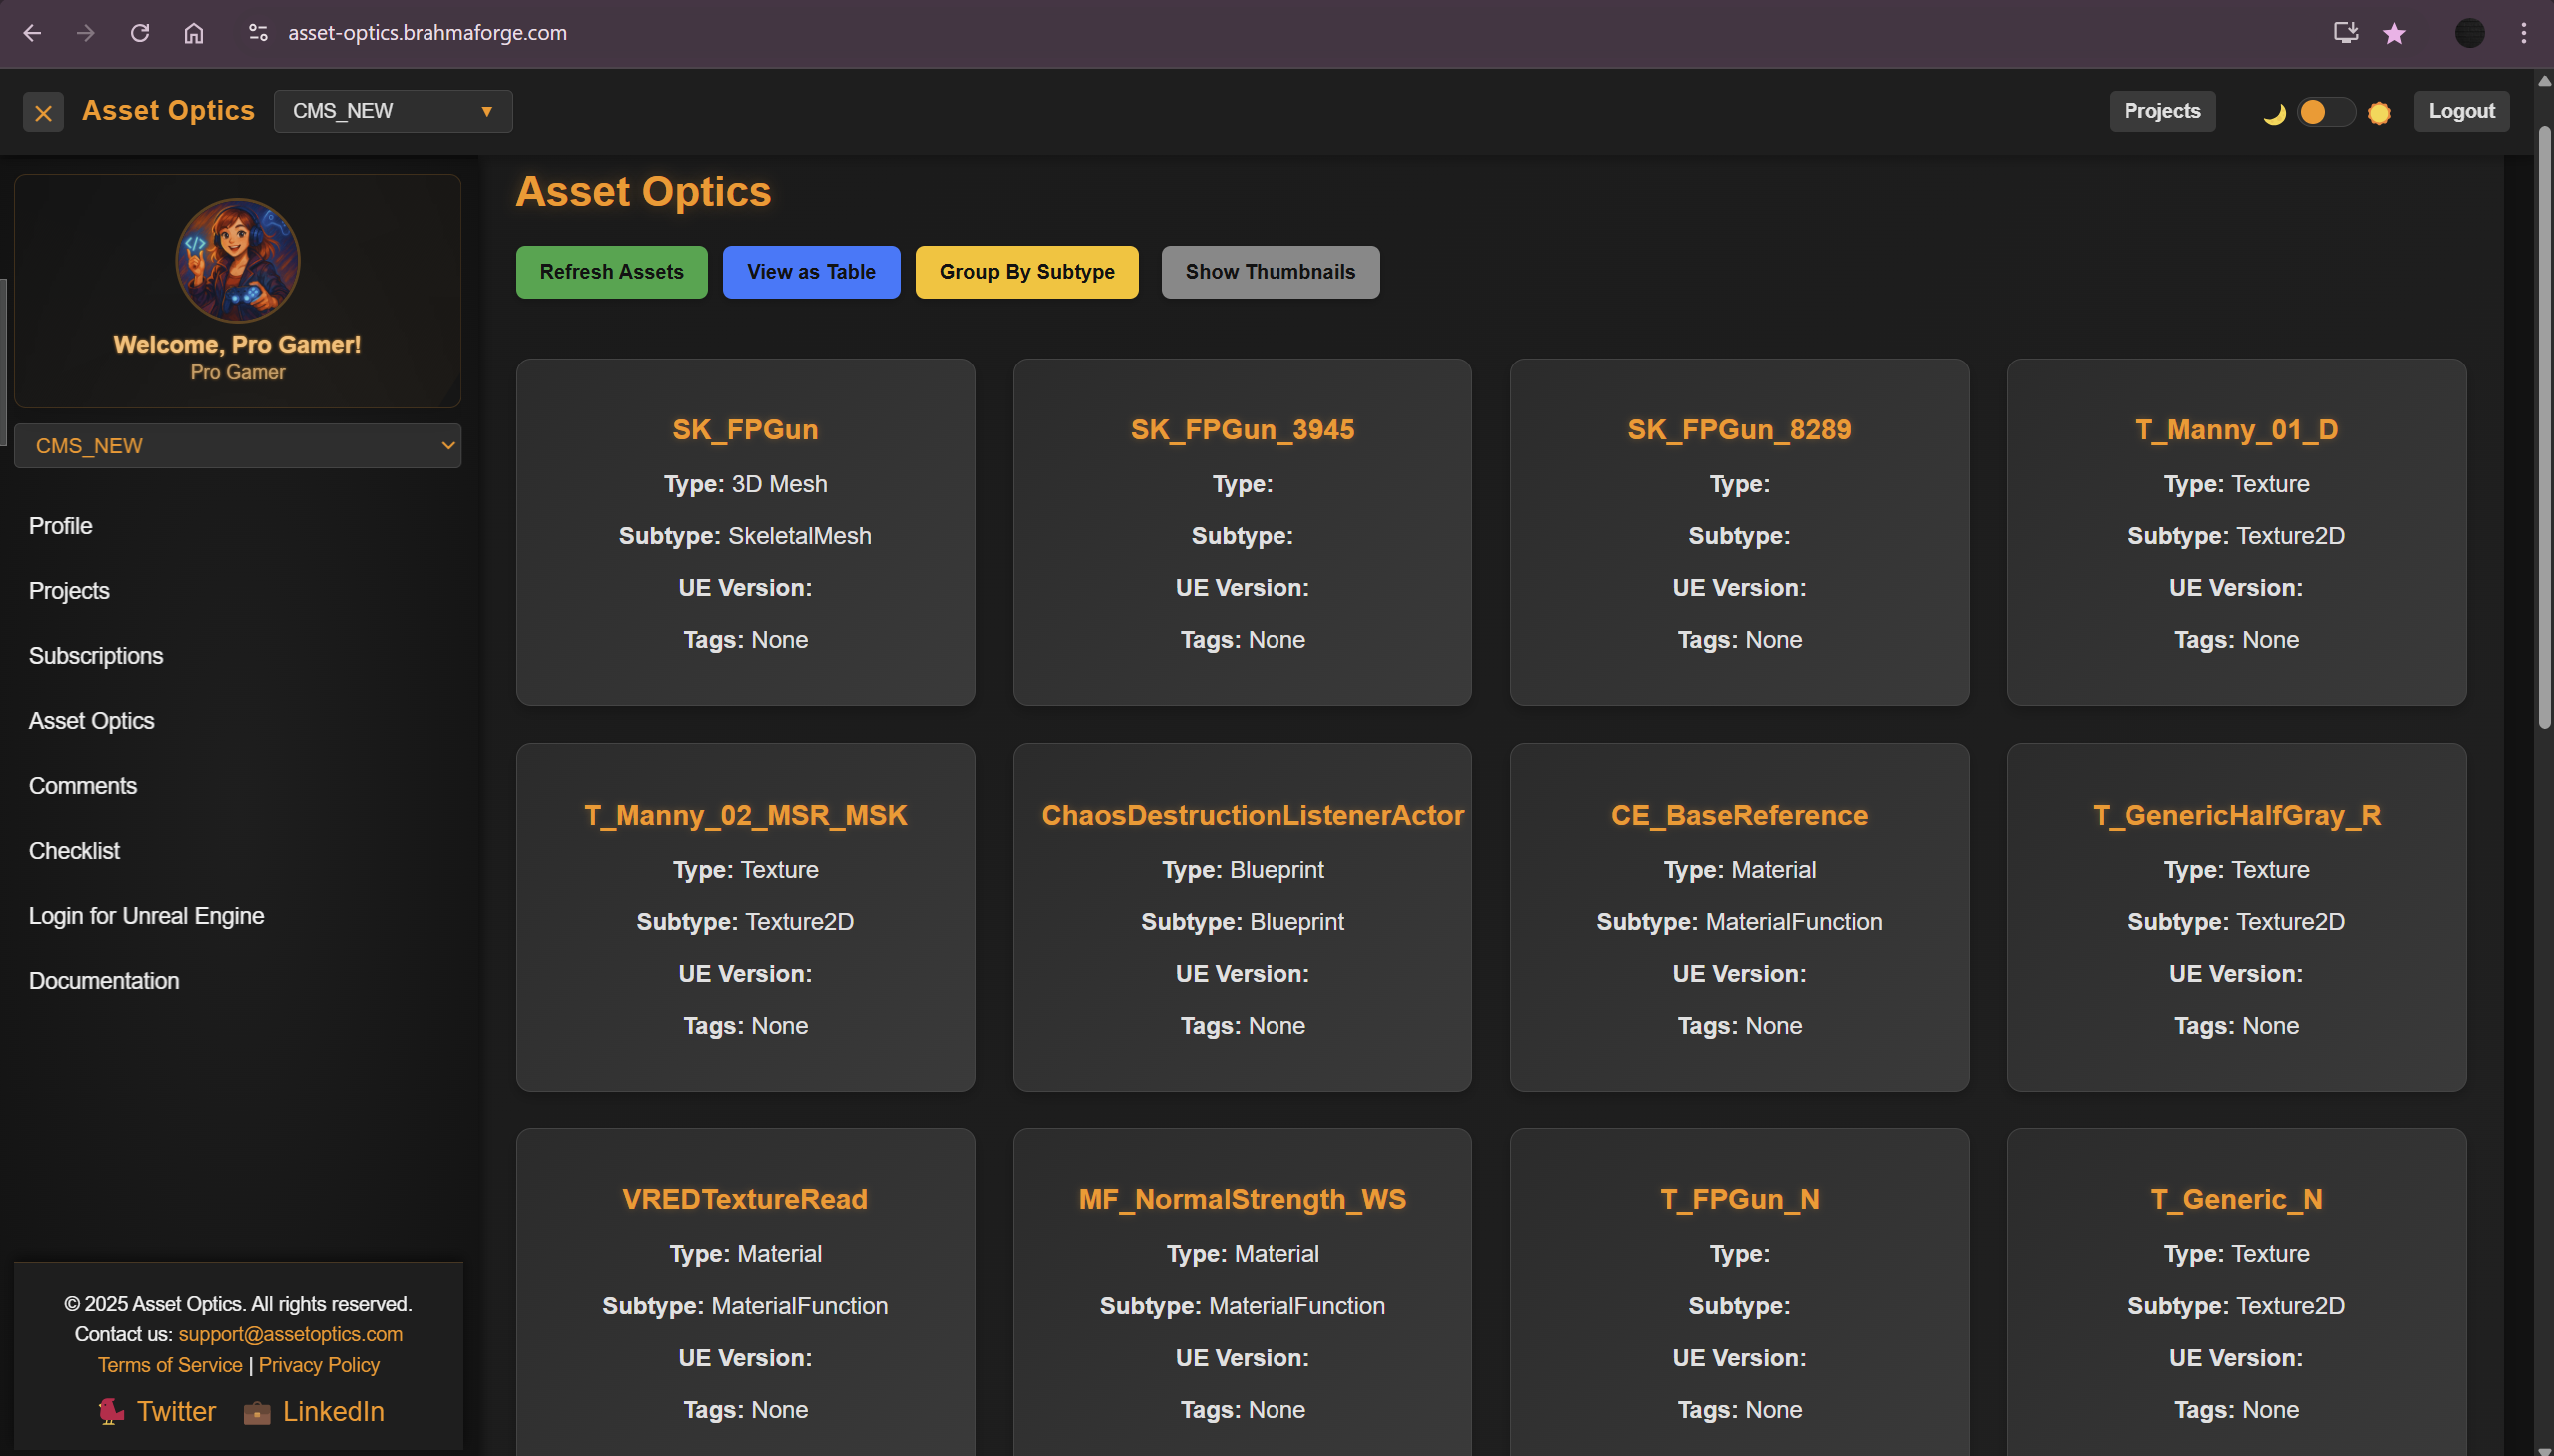
Track & Annotate Assets in the Webapp
How to Track & Annotate
- In the webapp dashboard, you will have multiple options .
- You can modify your profile based on your preference.
- In the Projects tab you can view the status of your project and can create projects , as described above.
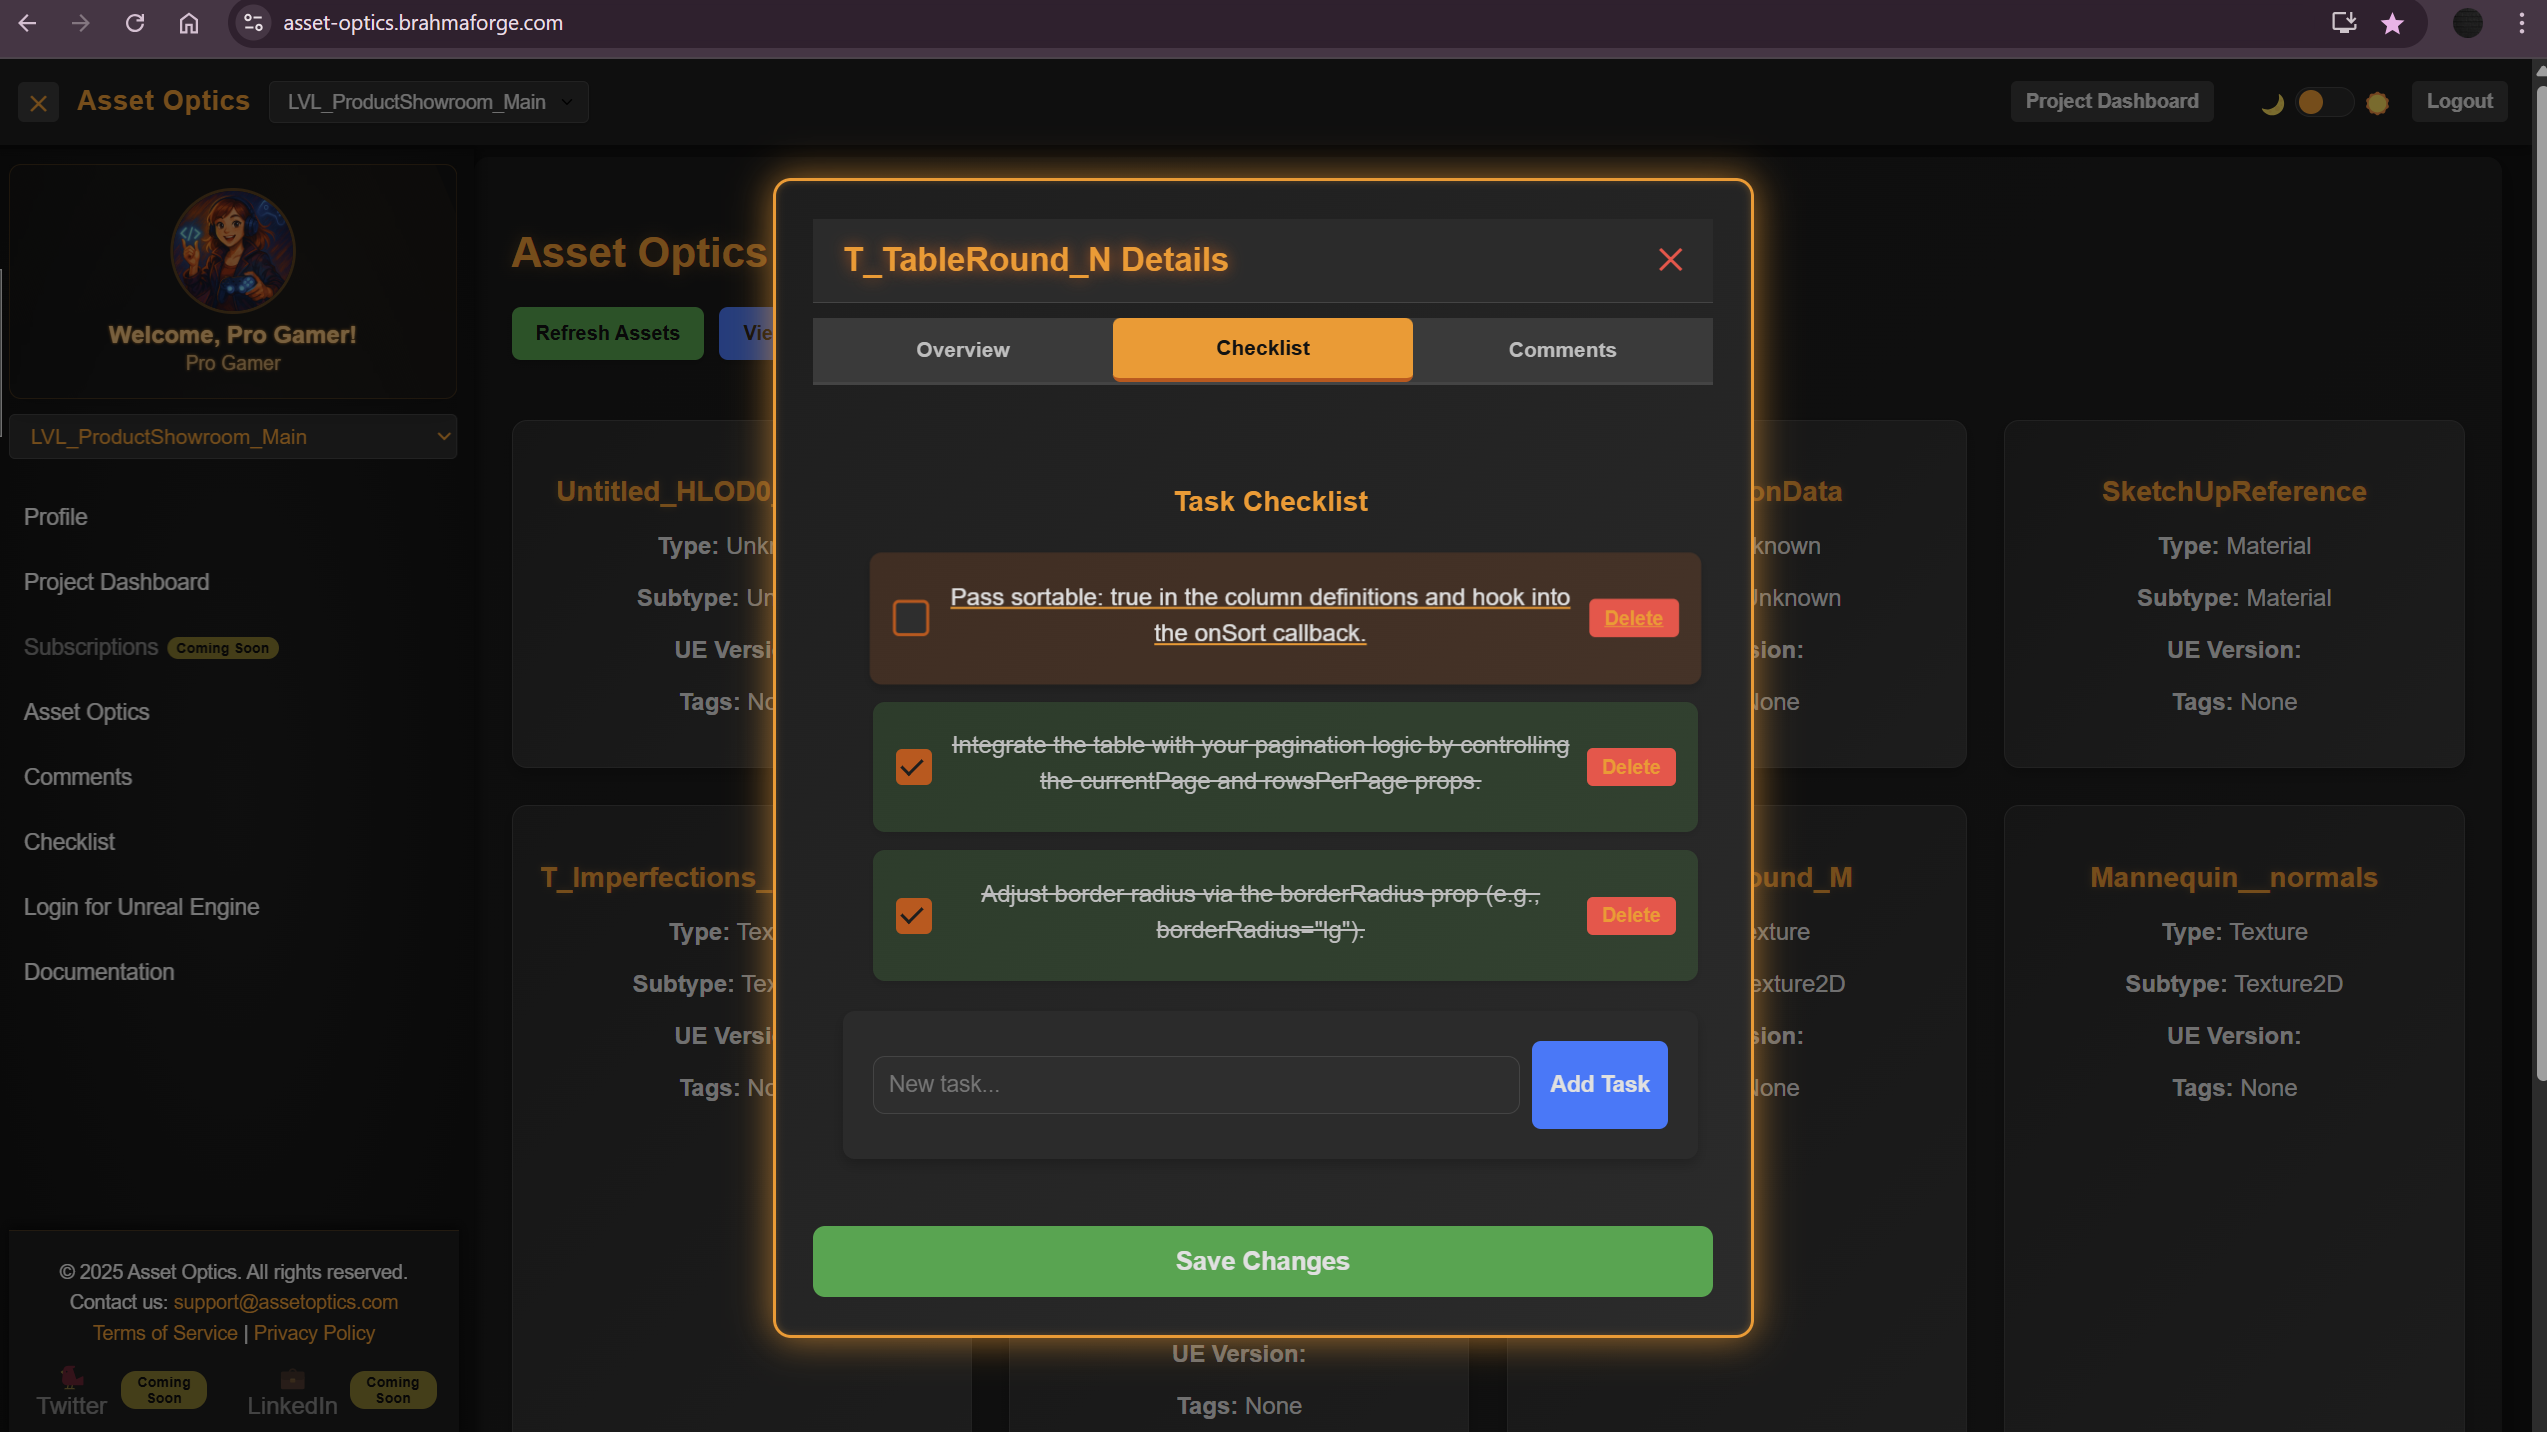
- In te Asset Optics tab , you can view all the assets for the selected projects in the card view
- For all assets you can see the comments , checklist , description and can also add your which will be syncd to your unreal engine profile.
- Fill in checklist items or comments, then click "OK" to save.
- Use the filter and sort controls to organize assets by status, type, or tags.
- Descriptions appear in the asset details pane—click to edit anytime.
- Syncs live with your Unreal Engine plugin for seamless workflow.