Asset Management
The Assets tab connects your Unreal Engine content to your production workflow, allowing you to track, organize, and collaborate on game assets.
Overview
Asset Optics automatically syncs your Content Browser assets and provides:
- Asset browsing and search
- Comments and checklists per asset
- Task linking
- Sync status tracking
Browsing Assets
Automatic Sync
Assets sync automatically from your Content Browser:
- Meshes, textures, materials
- Blueprints and widgets
- Audio and VFX
- Levels and other content
Search
Use the search bar to find assets by:
- Asset name
- Asset type
- Path in Content Browser
Filters
Filter assets by:
- Type: Mesh, Texture, Blueprint, etc.
- Sync Status: Synced, Pending, Error
- Has Comments: Assets with discussions
- Has Checklists: Assets with requirements
- Linked to Task: Assets connected to tasks
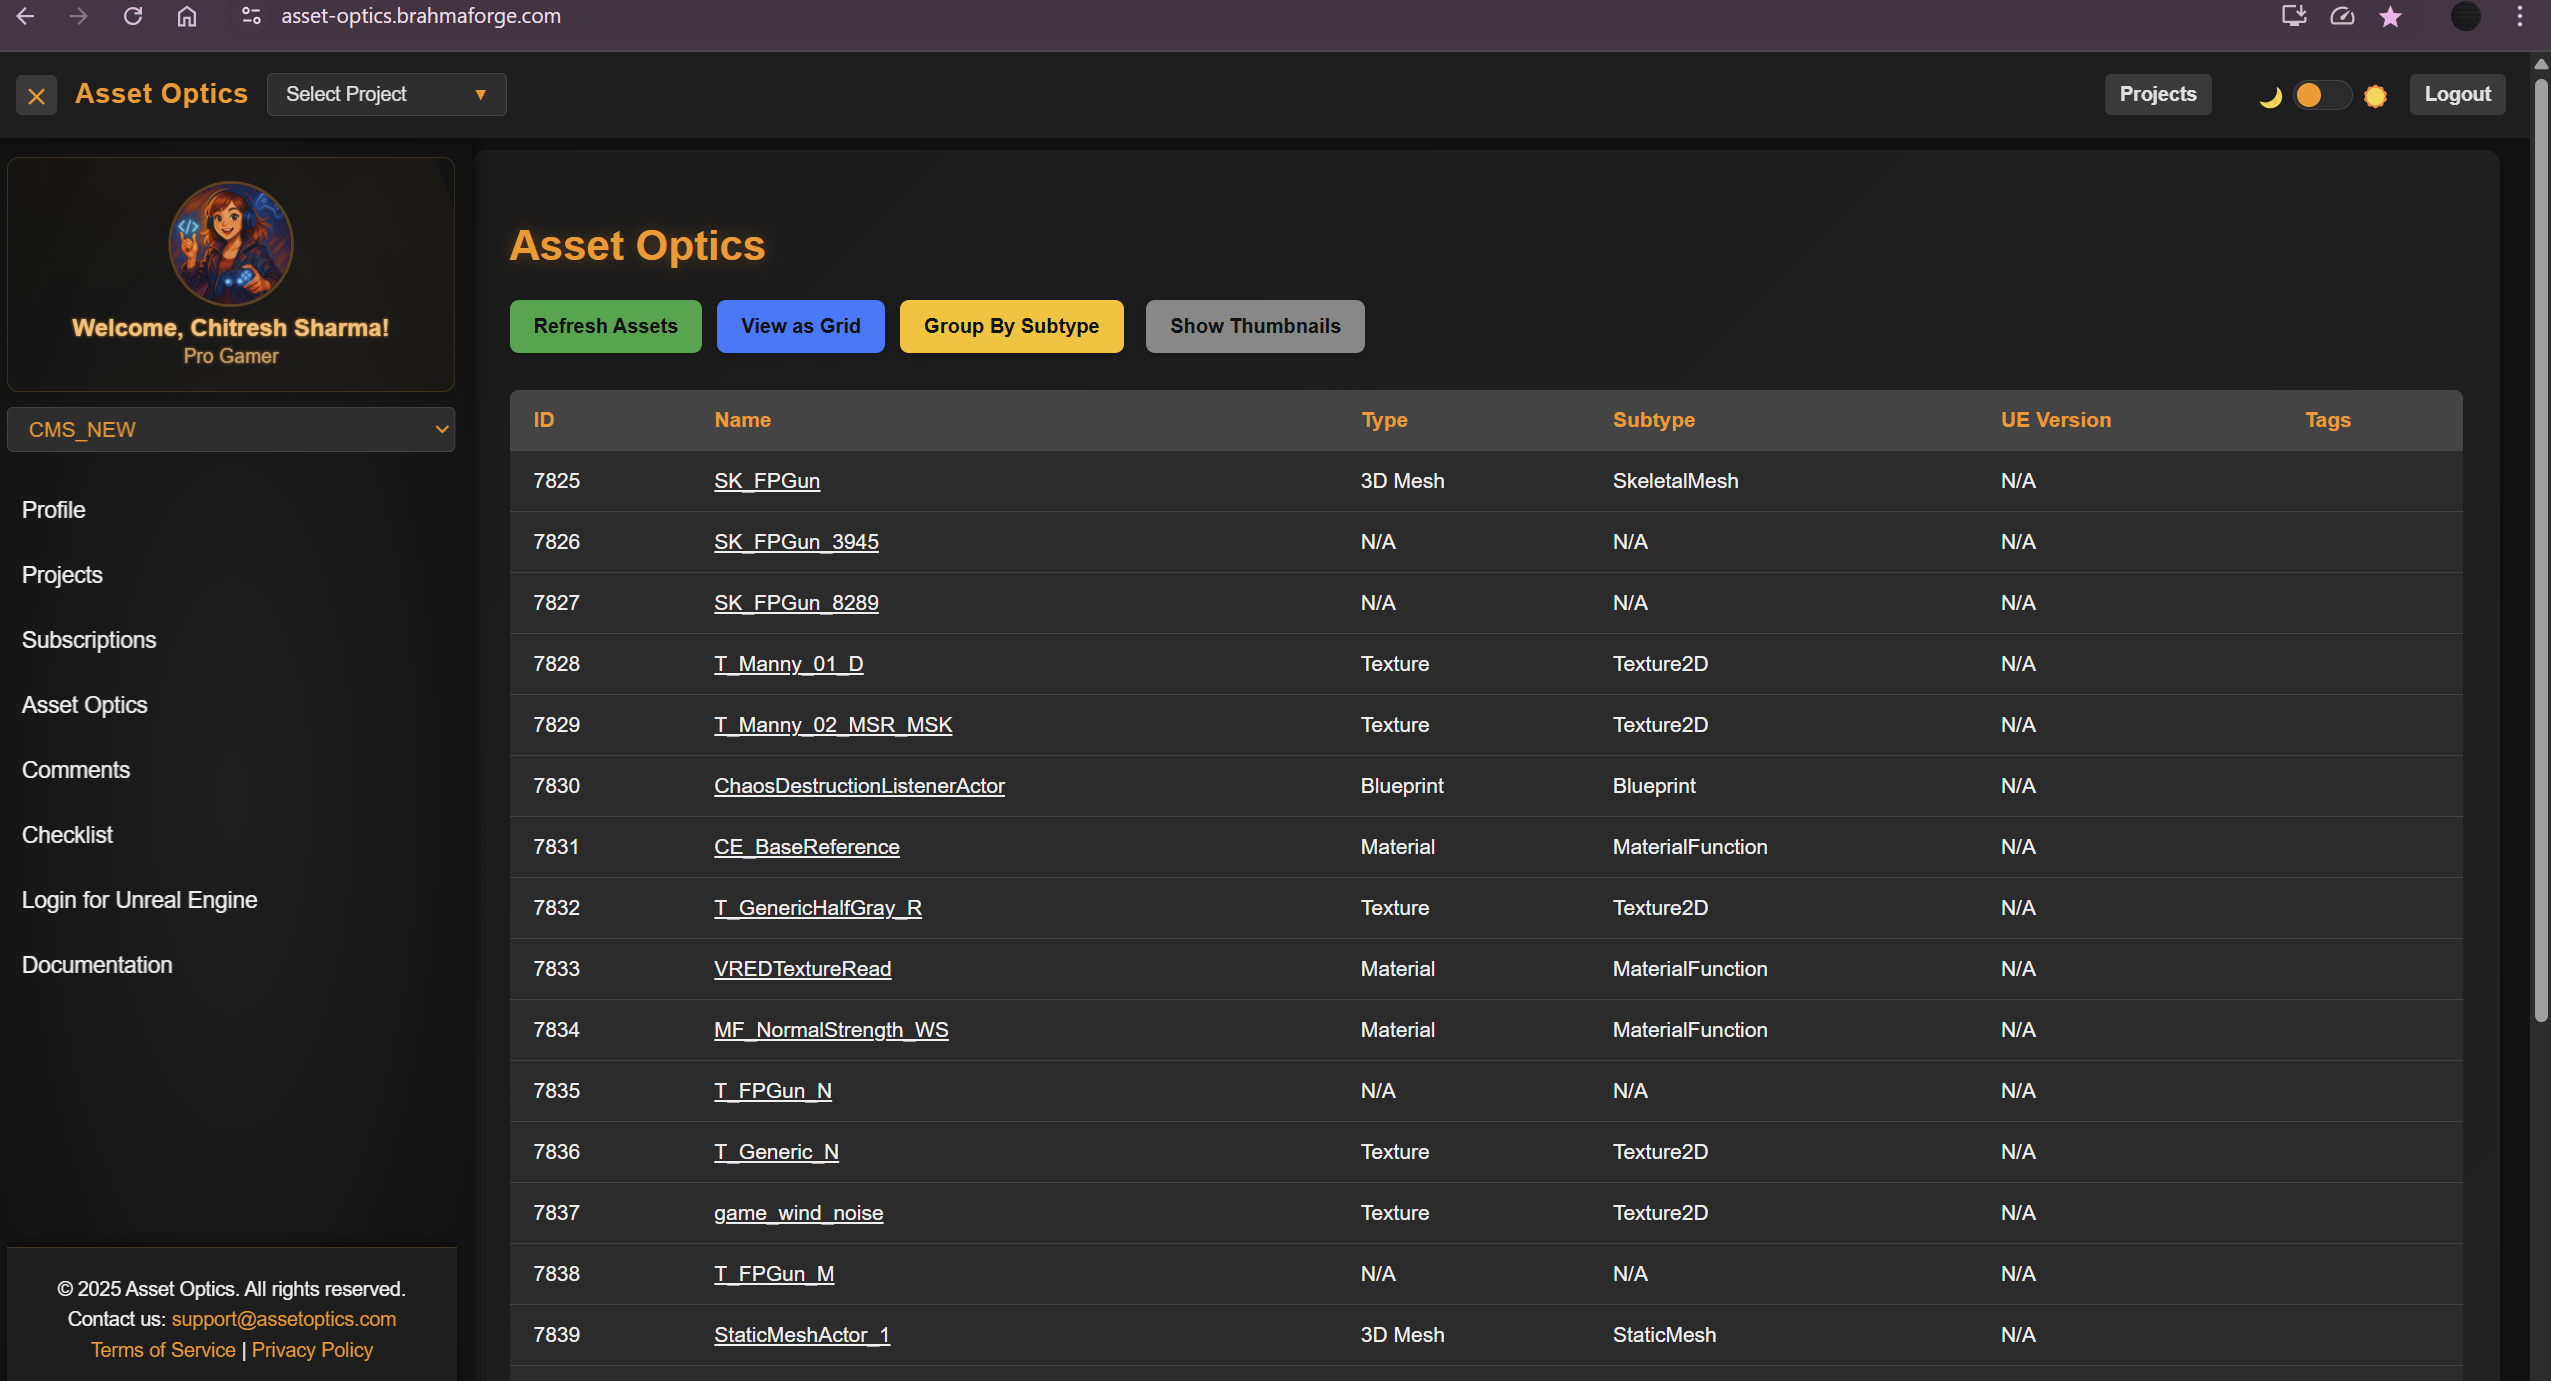
View Modes
Switch between views:
- Card View: Visual grid with thumbnails
- Table View: List with detailed metadata

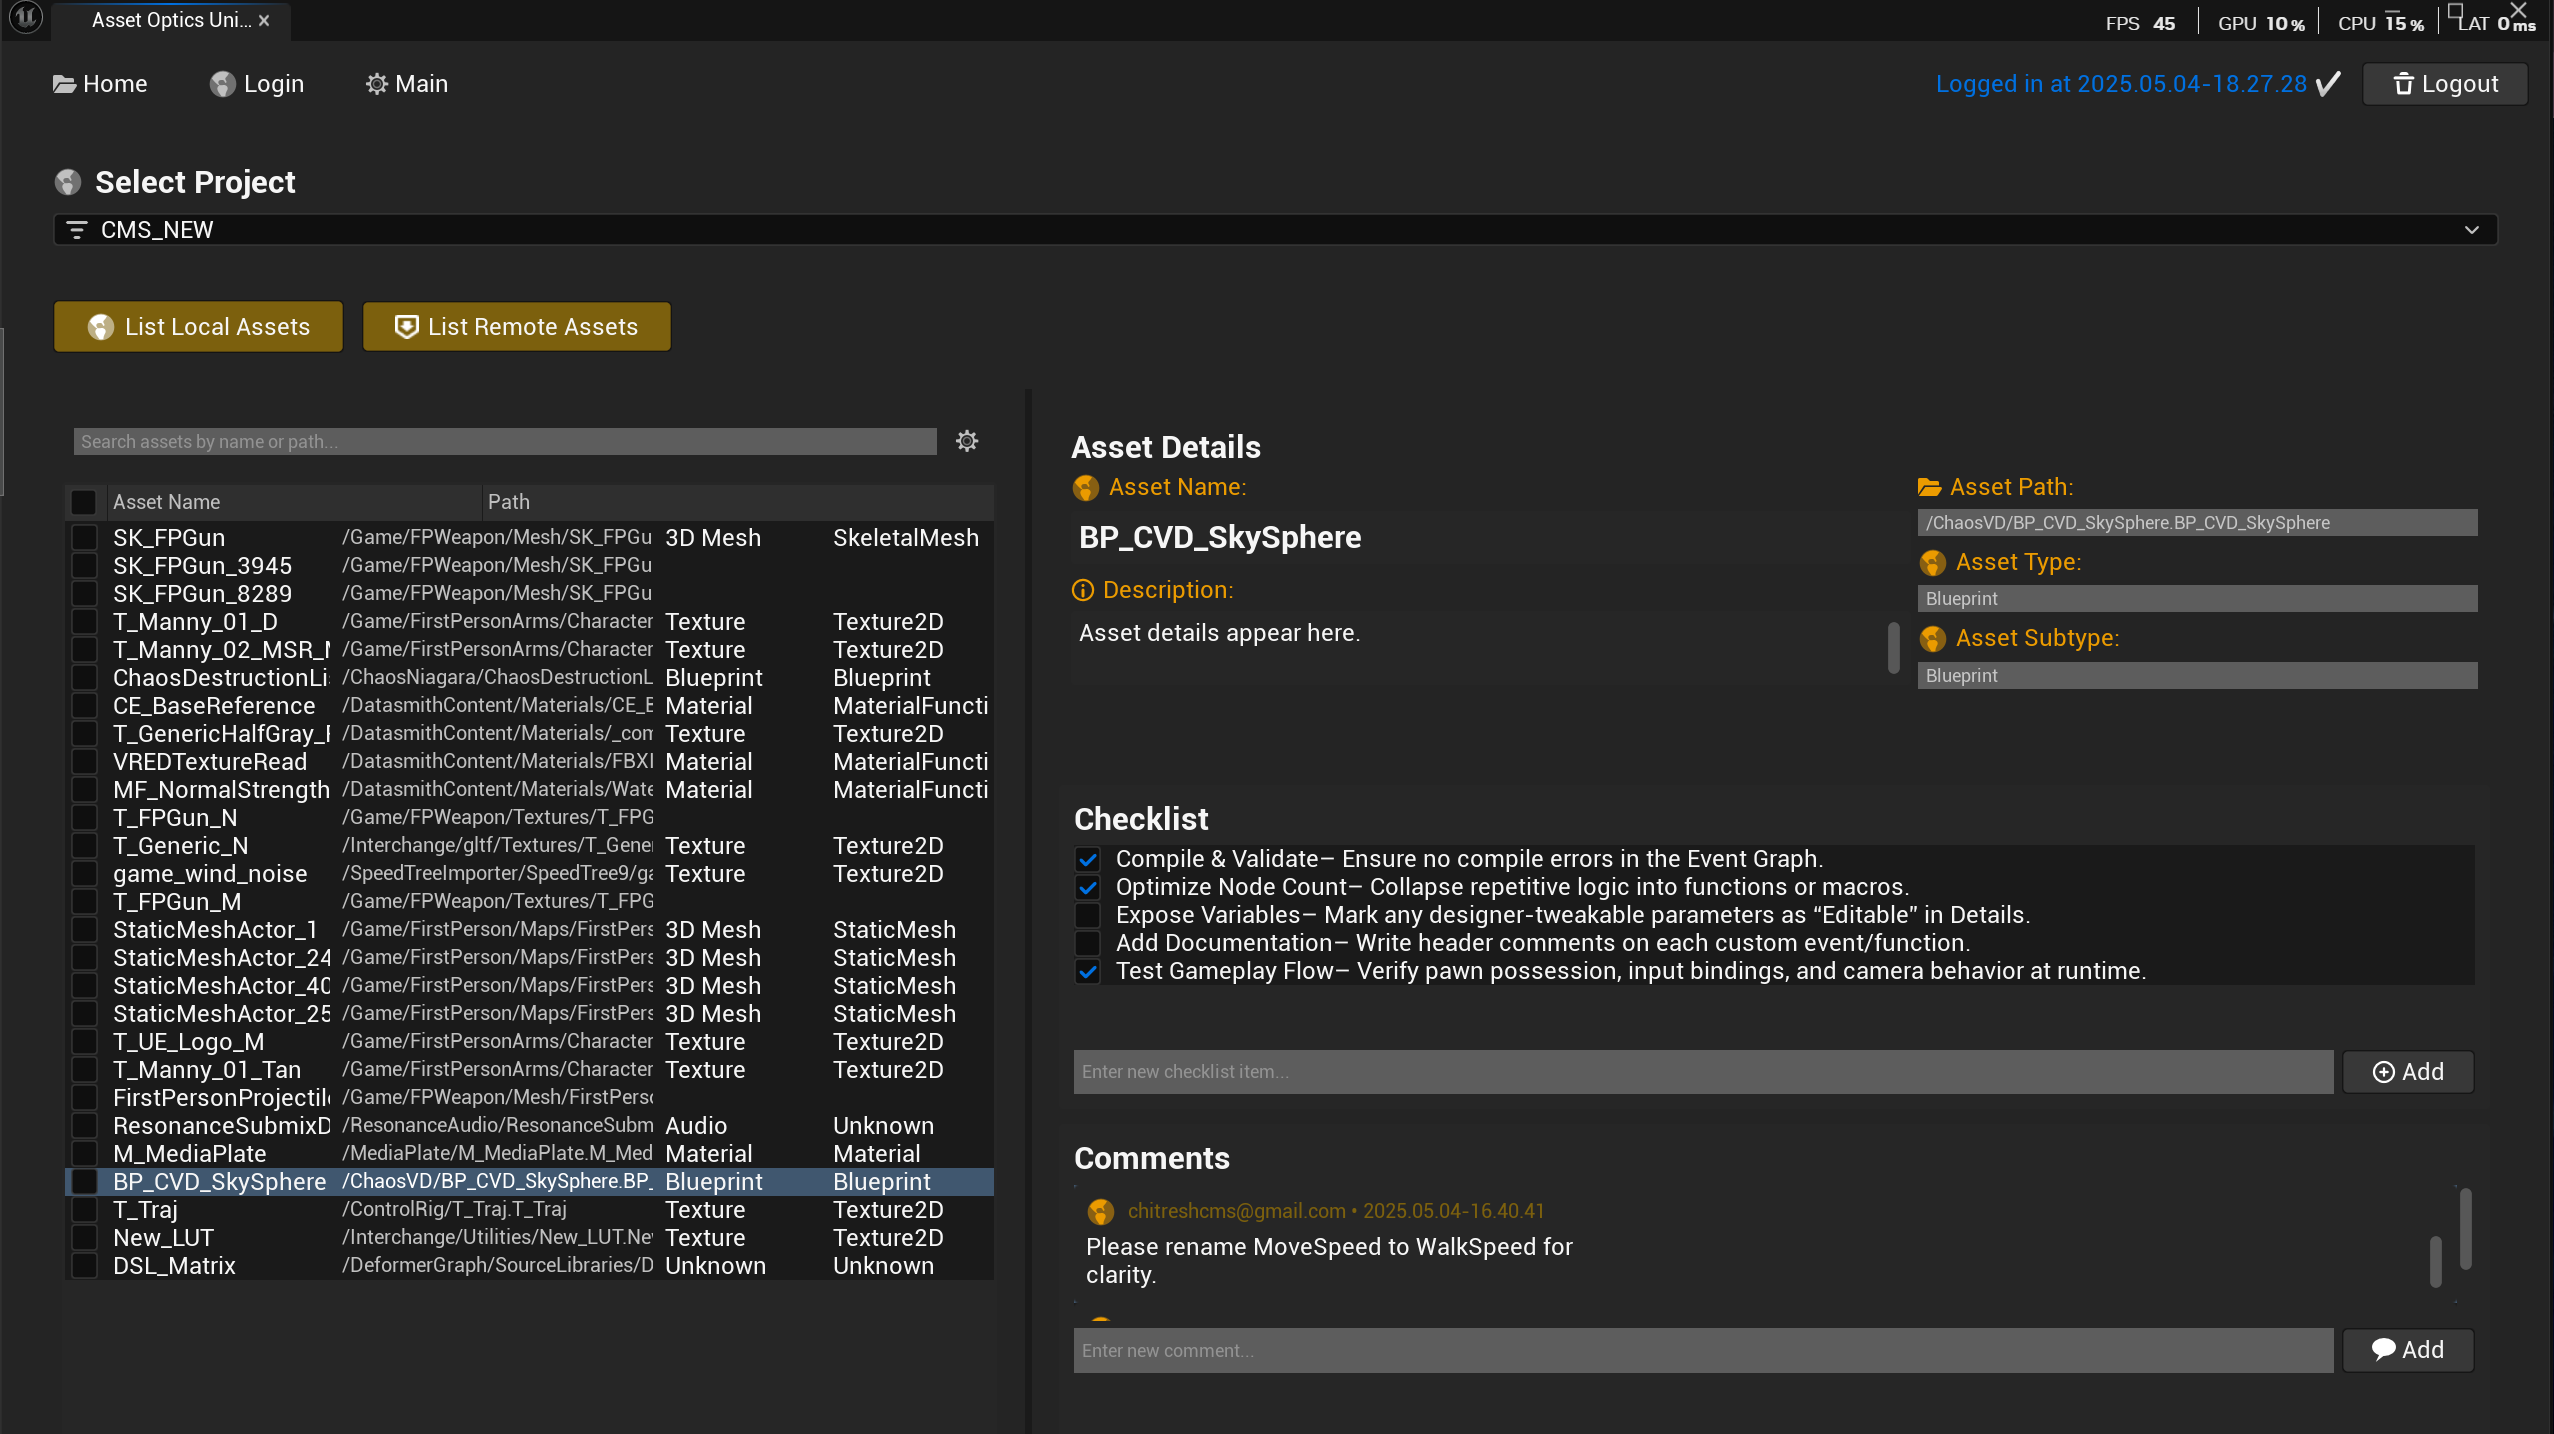
Asset Details
Click any asset to open the detail view:
Metadata
- Asset name and type
- Content Browser path
- File size
- Last modified date
- Sync status
Comments
Collaborate with comments on assets:
- Open an asset
- Scroll to the Comments section
- Type your comment
- Click Post
Use comments for:
- Feedback from artists or designers
- Notes about required changes
- Questions for team members
- Approval status
Inline Editing
Edit comments directly:
- Hover over your comment
- Click Edit
- Make changes
- Click Save
Checklists
Track requirements for each asset:
- Open an asset
- Go to the Checklist section
- Click Add Item
- Add requirements like:
- "UV mapping complete"
- "LODs generated"
- "Materials applied"
- "Collision set up"
- Check off as you complete each
Linking Assets to Tasks
Connect assets to the tasks that create or modify them.
From an Asset
- Open the asset detail view
- Click Link to Task
- Select an existing task or create a new one
- The asset appears in the task's linked assets
From a Task
- Open a task in the Planning Board
- Go to the Linked Assets section
- Click Add Asset
- Search and select assets to link
Benefits of Linking
- See which tasks affect which assets
- Track asset completion through task status
- Navigate between related work
- Understand dependencies
Syncing
How Sync Works
- Asset Optics scans your Content Browser
- New and modified assets are detected
- Metadata is uploaded to the cloud
- Changes sync to web dashboard and team members
Triggering Sync
Sync happens automatically, but you can force it:
- Click the Refresh button in the Assets tab
- Changes in Content Browser trigger sync
- Opening Asset Optics triggers a sync check
Sync Status
Each asset shows its sync status:
| Status | Meaning |
|---|---|
| Synced | Up to date with cloud |
| Pending | Changes detected, syncing |
| Error | Sync failed, retry needed |
Best Practices
Use Comments for Feedback
Instead of external tools, use asset comments for:
- Art feedback
- Technical requirements
- Approval workflows
Create Checklists for Standards
Standardize asset requirements with checklists:
- LOD requirements
- Material standards
- Naming conventions
- Technical specs
Link Assets to Tasks
Always link assets when:
- Creating a task about a specific asset
- Working on asset-related bugs
- Tracking asset milestones
Keep Assets Organized
- Use consistent naming in Content Browser
- Organize into logical folders
- Asset Optics reflects your Content Browser structure
Troubleshooting
Assets Not Appearing
- Click Refresh in the Assets tab
- Verify the asset exists in Content Browser
- Check the asset type is supported
- Try logging out and back in
Sync Issues
- Check your internet connection
- Click Refresh to retry
- Verify
asset-optics.brahmaforge.comis accessible
© 2026 BrahmaForge. All rights reserved.